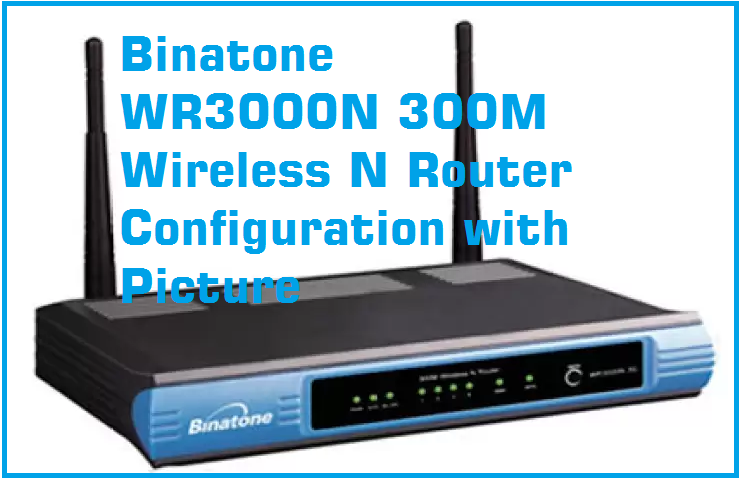
Binatone WR3000N 300M Wireless N Router Configuration
Although this tutorial’s title is Binatone WR3000N 300M Wireless N Router Configuration this will also belong to TP-LINK TL-WR841N 300Mbps Wireless N Router, TL-WR743ND, TL-WR701, Iball All Wireless Router, and Binatone WR-1505N3, WR1500N,W R3005 router configuration. This all router manufacturer same so all brand router firmware is the same only difference is the design and color of an interface. After complete these tutorials, you can easily configure Binatone, TP-Link, and I-Ball all wireless N router configurations without any problem.
- How to Connect Any Wi-Fi without Password from Mobile?
- How to block any Website and Apps on basic WiFi Router
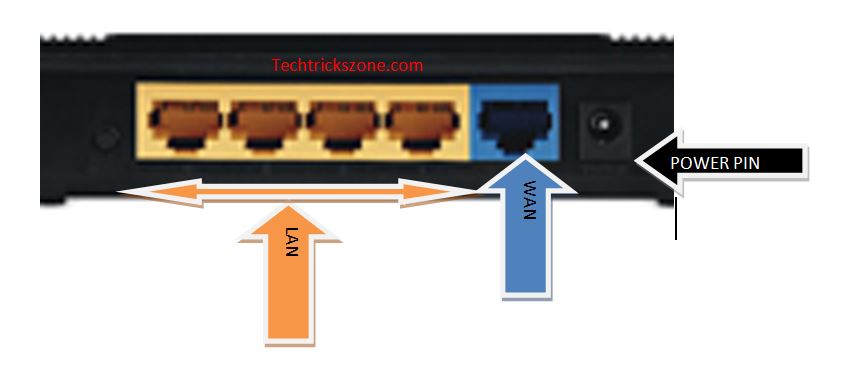
Binatone WR3000N-300Mbps Router connection Diagram
Connect WR3000 Router Lan port to PC/Laptop and Wan Port to Internet Cable coming from ISP (Internet Service provider)
Binatone WR3000N – 300M Wireless N Router Configuration Step to step
Binatone WR3000N 300M Wireless Router
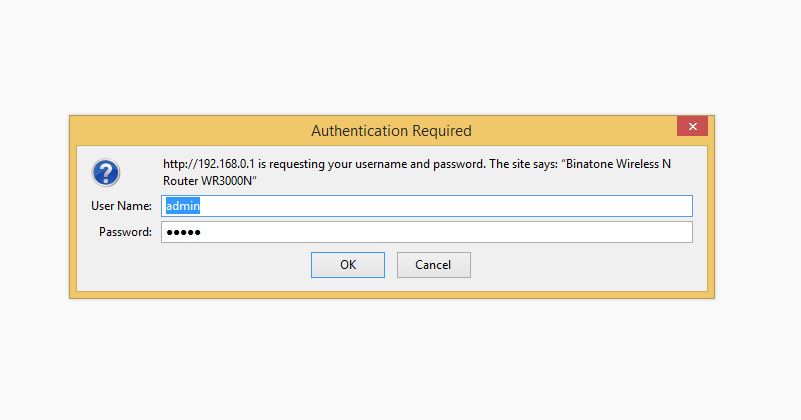
Default IP Address is – 192.168.0.1
Default username – admin
Default Password – admin
Login Binatone Router:
Before open router in web ,broswser make sure your router LAN Port (yellow port) should be connected to PC/Lapotp Lan port and IP Configuration should be DHCP mode. see how to configure PC/Laptop IP
Now open Internet Browser and open Binatone Default IP 192.168.0.1 and use the default username and password to login router.
- Trending Post : How to check who is using your Wi-Fi from Mobile (3 Way)
Binatone WR3000N 300M Wireless N Router Configuration WAN.
Any router must be configured in WAN port if we want to use in router mode. In router mode, we can use many services like firewall , Bandwidth control, Parent control, content filtering , internet working schedule configuration to limit the internet use from students.
Proceed to WAN configuration Follow Below Steps.
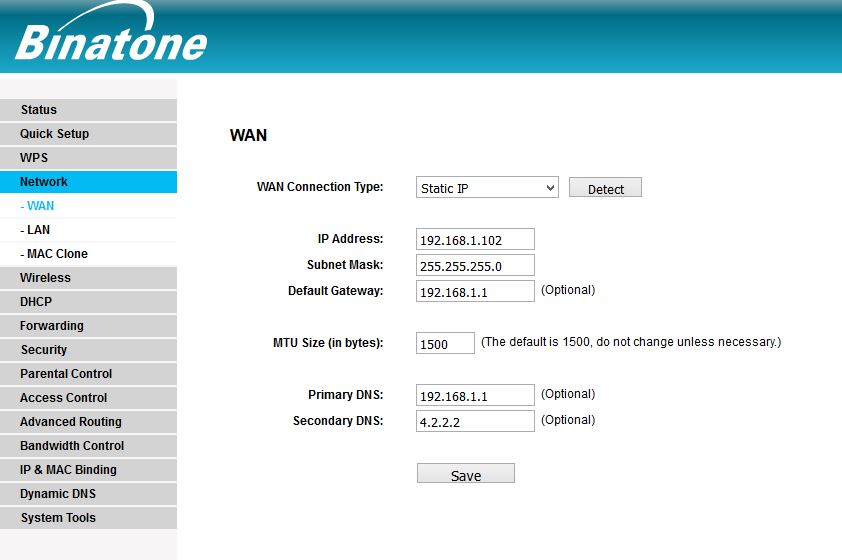
Wan settings-
Go to Network –> Wan
Choose your WAN type from List,
Dynamic – for auto IP assign
Static- Get IP Address from your ISP or use f you know your internet IP
PPPoE- ask your ISP to your Dial-up username password or use if you have already.
Here I am using Static ip
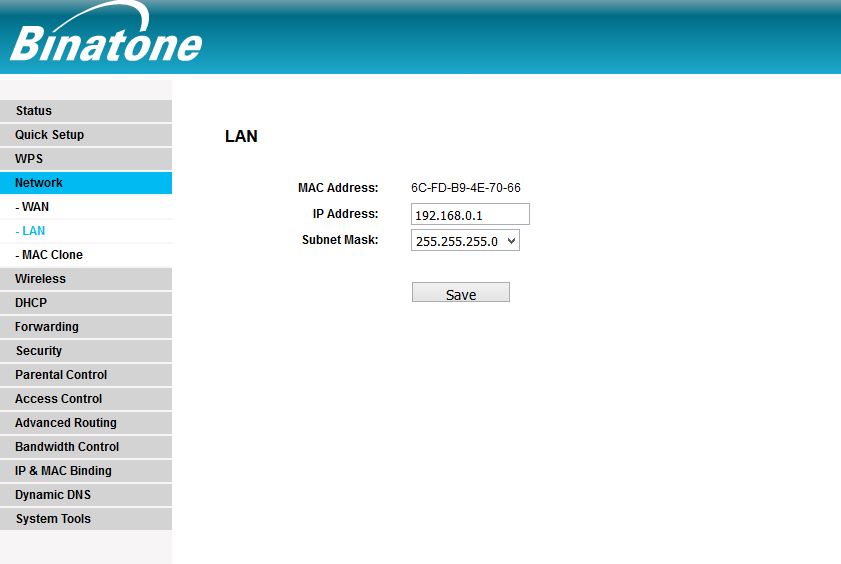
LAN Settings :
Lan settings not necessary to change LAN IP Address if you are using the router in the home or your ISP has given IP Address not same of Router Default IP address. But This is Tutorials so we will teach LAN IP change also. Follow Given Steps.
Network–> LAN
Note: After Change LAN IP address you must use new IP Address to open your router again.
Binatone WR3000 300M Wireless Settings:
Go to Wireless—Wireless Setting-
SSid (Wireless Network Name)- choose your WiFi name here
Country : choose your country to ensure legal use of the router
Channel – Select from 1 ~11 no.
Mode : use MIX to compatible with all N and BG series Wireless devices
Tx rate : you can select from the list as per your speed requirement.
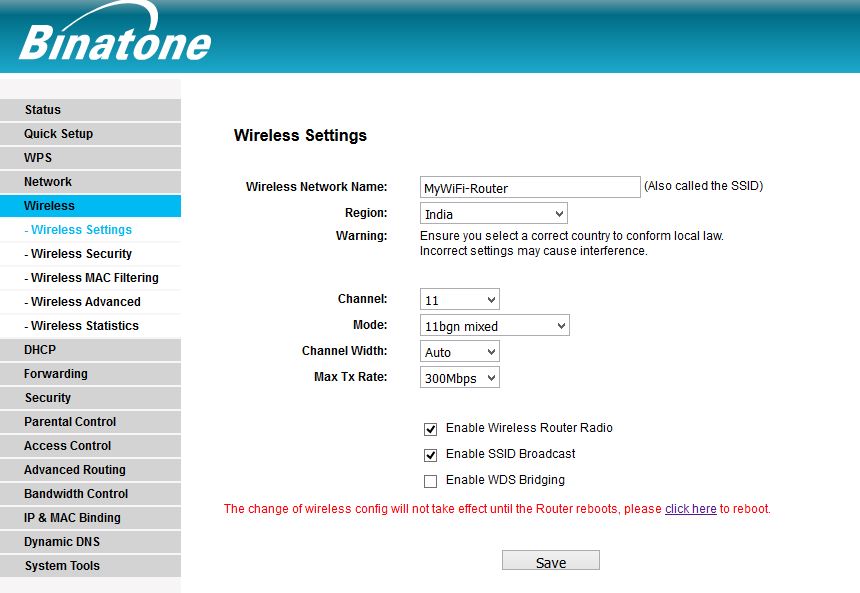
Click save: the router will notification you to reboot the router to take change affect.
Before rebooting set wireless security setting to save your time.
Binatone WR3000N 300M Wireless N Router Wi-Fi Security Settings
Wireless –> Wireless Security
WEP –use Minimum 10 Digit numeric to use this key
WPA/WPA2 – Enterprise : if you are using Radius Server then you can configure this Enterprise security type.
WPA/WPA2 – Personal(Recommended) : for personal use we highly recommended this key to make strong wireless security . you can use Alfa numeric combination password.
After set password click save and reboot.
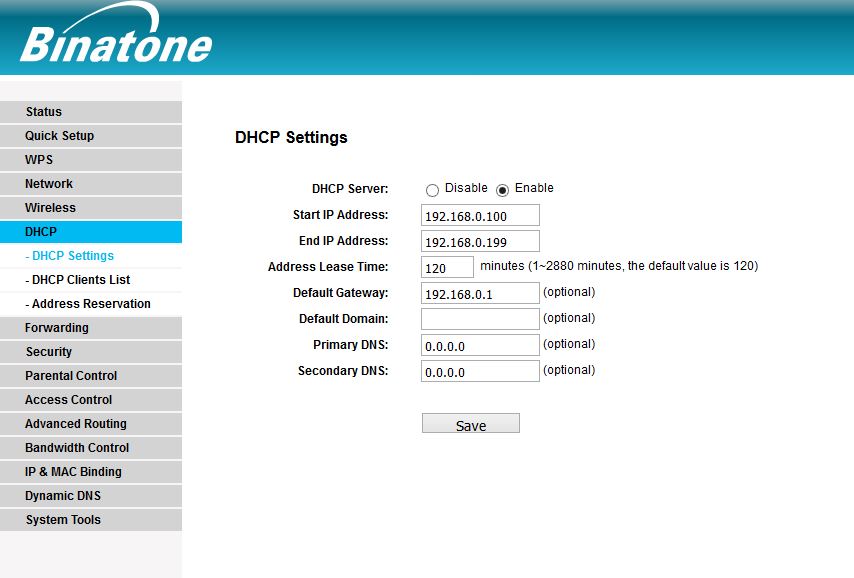
Binatone WR3000 300M Wireless N Router DHCP configuration.
After Configuration of Wireless Router if your Mobile and LAptop not getting connected with Wi-Fi then reason can be DHCP disabled in the router. If DHCP will disabled then Router will not assign auto IP Address to the Client device and in the mobile device, it will show saved network name. follow the step to Enable DHCP in binatone Routers.
Click DHCP from the left side menu.
| DHCP Server: | Disable Enable |
| Start IP Address: | |
| End IP Address: | |
| Address Lease Time: | minutes (1~2880 minutes, the default value is 120) |
| Default Gateway: | (optional) |
| Default Domain: | (optional) |
| Primary DNS: | (optional) |
| Secondary DNS: |
Related Post
- How to block any Website and Apps on basic WiFi Router
- Top 5 Best Free Parental Control Software for PC, Mac, iOS, Android
- How to Recover Deleted Photos and Videos from Memory Card
- How to Choose Best Wi-Fi Router for Your Home
Firmware Download Binatone WR3005 N3
Download Now
See Video Tutorials for Binatone WR3000N 300M Wireless N Router Configuration
