Cyberoam firewall cr25ing, cr50ing and cr100 firewall basic configuration and setup to configure with static IP internet connection. read the full user manual to get Cyberoam NG Series Firewall Configuration step by step using pictures.
Cyberoam NG Series Firewall Configuration & Setup
Although the title contains Cyberoam cR50i Ng firewall configuration, it also belongs to all NG series model configuration manuals. Cyberoam is the most trusted and popular brand in firewall security appliances for home and official networks. The firewall appliance is the most required device to protect your network from outside attacks and virus. Today every important and sensitive information shared using the only internet so security of network should be ensured and stronger. Every enterprise-level company appoint a dedicated firewall expert who can manage and monitor firewall security appliance to keep the network safe and protect from any types of attacks. I have created this Cyberoam NG Series Firewall Configuration manual in an easy way so you can make your network protected yourself.
The Firewall security device is highly recommended if your business related to finance, account, and other sensitive information based, to make it protect always. The firewall appliance not only protect your network but you can also manage your internet speed and block unusual website and keywords in your networks. However you can find many firewall security device for your home as well as office, but before buy you should understand how to choose the best firewall for home and office network. You can also find top firewall security appliance brand with an additional feature here.
Cyberoam NG Series Firewall Configuration First Time
Cyberoam UTM (Unified threat management) is the best solution for SOHO. It is an easy web interface to understandable and configures by anyone using simple steps. You can easily manage your Cyberoam firewall yourself after basic understand about firewall features and how it works.
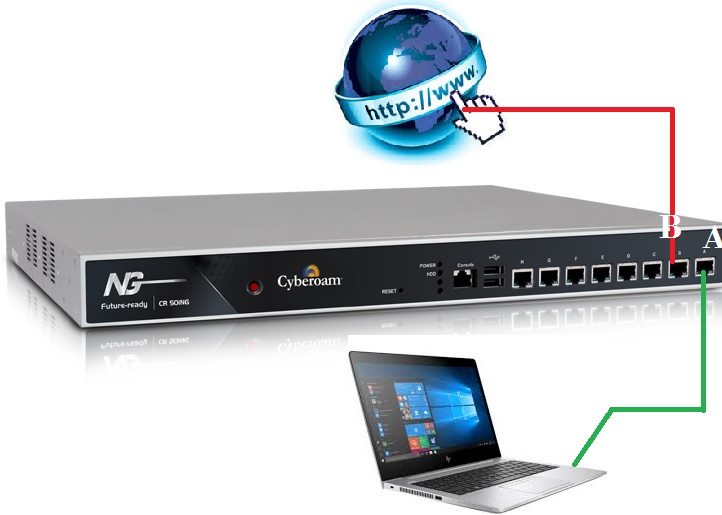
Cyberoam Firewall Physical connection diagram
The first step of configuration any firewall device is to connect with the physical network.
Connect A Port to Switch or PC/Laptop to configuration purpose. Once configuration completed, you can connect to switch.
Port B connects your internet cable coming from your ISP side.
Keep ready internet IP settings to configure the device.
Once physical connection ready you can proceed to the configuration part. To access and configuration, you required default settings of Cyberoam NG series firewall.
- Top 5 Best Free Parental Control Software for PC, Mac, iOS, Android
- 5 Best L3 Managed Network Switch for Small and Large Network
- The 10 Best VPN for Windows 10, Mac OS, Android and iOS [Free & Paid]
Cyberoam Firewall Default factory setting
Firewall Model Username Password IP Address
CR100ia cyberoam cyber 172.16.16.16
CR15i cyberoam cyber 172.16.16.16
CR25ia cyberoam cyber 172.16.16.16
CR50ia cyberoam cyber 172.16.16.16
These all are the Cyberoam model number supported with this user guide manual.
Configure your PC/Laptop LAN IP to default series of Cyberoam firewall.
EXP- 172.16.16.16 is the Cyberoam UTM default IP, use 172.16.16.17 in your PC/Laptop.
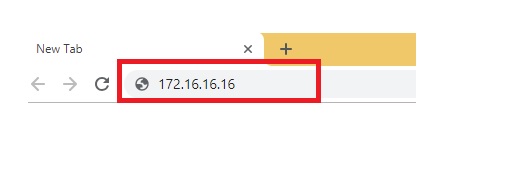
Cyberoam Firewall Web Console Login first time
Open the Web browser and type default IP 172.16.16.16 and hit enter.
Use default username password if you access firewall first time. If you changed password already please use the same to login web console.
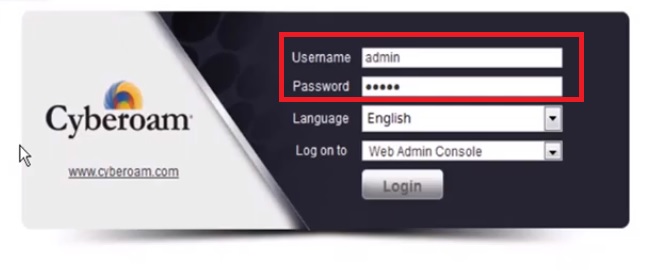
After Login firewall will land on the status page where you can see all the status and software, hardware version details.
Cyberoam Security Firewall WAN Configuration
To access the internet through a firewall WAN port configuration should be configured as per the internet settings of your internet providers.
To configure WAN port follow the steps as shown in the image.
Go to Network—Interface
Inside interface, you will get the list of all physical port in your firewall device.
For WAN Choose Port B to configure with internet IP address.
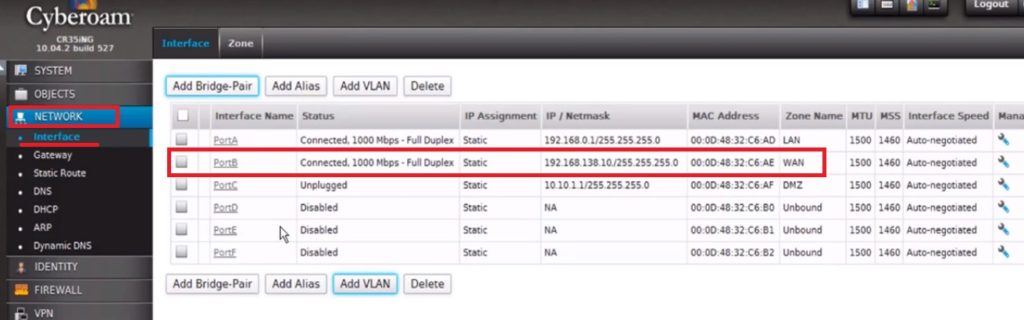
Click on Port B to edit the configuration.
Port B- Physical interface
1: Network Zone – WAN selected (if not you can select WAN from the list)
2: IP Assignment – Choose the internet type (static, PPPoE or DHCP)
(Here I am using a static IP address for my internet)
3: IP Address– type your internet IP address in this box you got from ISP.
Netmask- Choose the netmask as per your internet settings.
4: Primary DNS: set the DNS as per your ISP or you can use it any other. ie. Global DNS.
4: Gateway Name- type the ISP gateway as per internet settings.
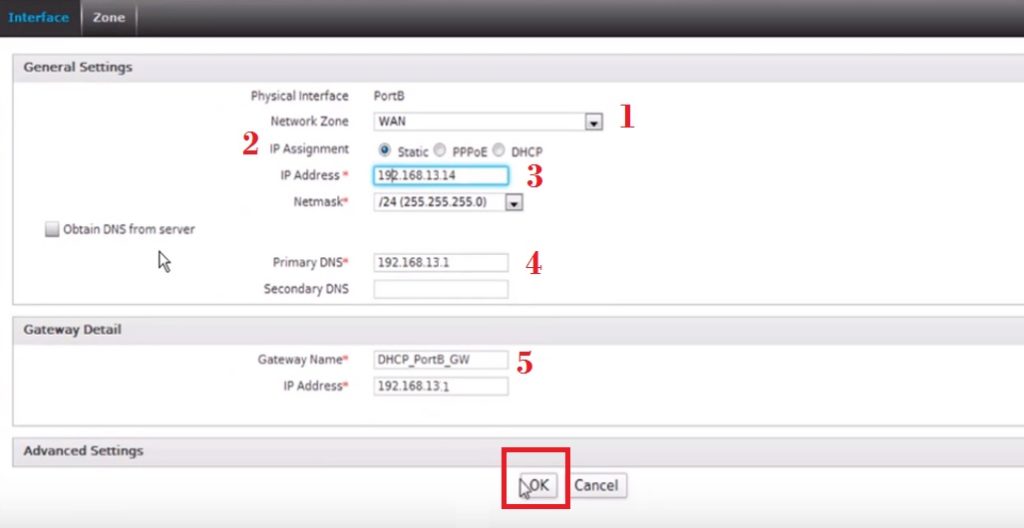
Press OK button save settings.
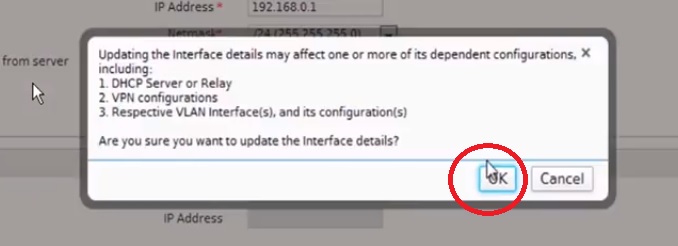
Press the OK button again to confirm settings changes.
Cyberoam NG firewall LAN IP Address Configuration
After WAN port configuration now LAN IP Address configuration required. As you know every device comes with default IP Address so recommend to change default settings always to keep protect your network device.
Go to Network—Interface
Choose the Port A for LAN IP settings.
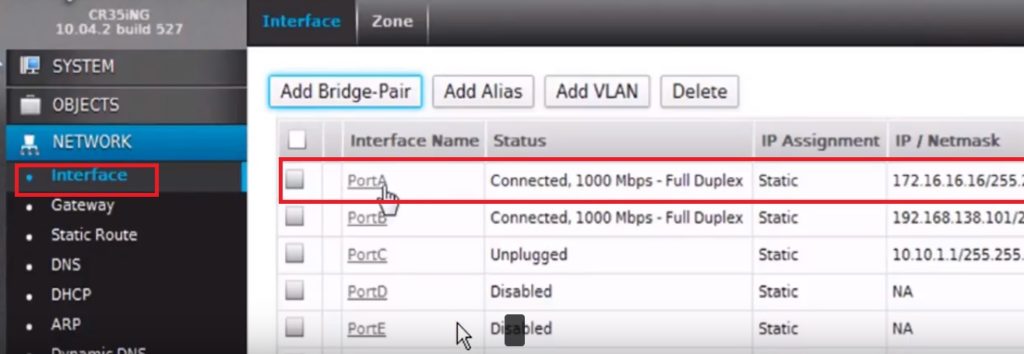
Network Zone- LAN (it’s by default selected)
IP Address- change default IP to your New IP address in this box and re-login device with new IP address as following above steps.
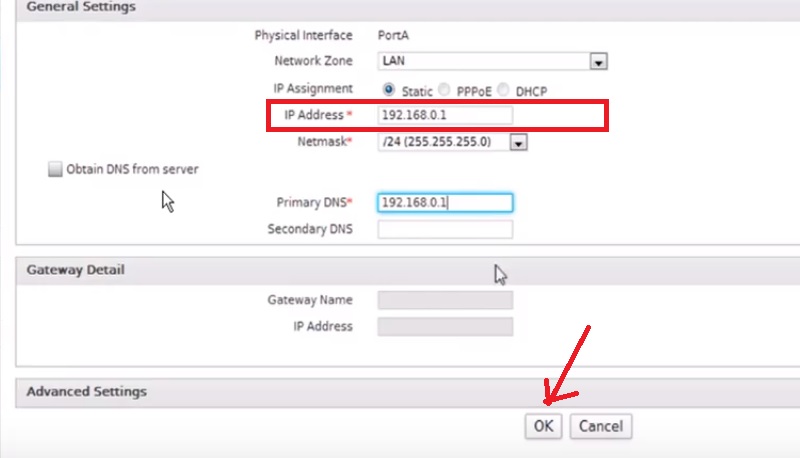
Press the OK button to save.
Press OK again to confirm.
After WAN and LAN configuration now DHCP pool configuration steps. If you have change LAN IP than DHCP server must be configured as per new LAN IP address.
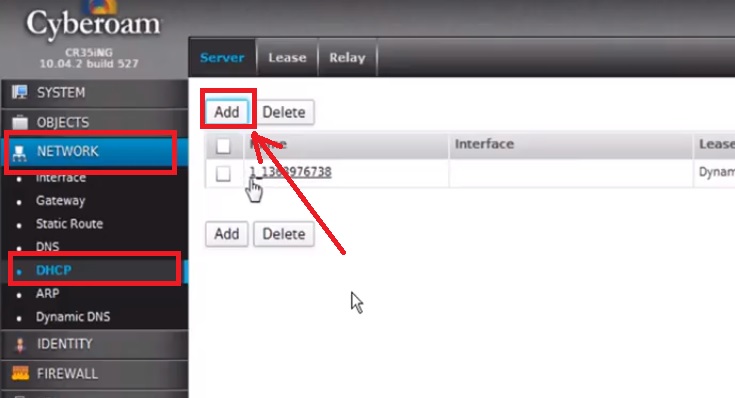
Go to Network – DHCP
Press Add button to add new DHCP server.
You will get all the DHCP settings as given below.
1: Name- Type the name of your DHCP server you want to give.
2: Interface- select the port from the list you configure LAN IP address for your networks.
3: Lease IP Range- select the DHCP IP range you want to provide in your network if any specific.
4: Subnet Mask– select the subnet mask as per IP you required in your network. ( use 24 for 254 IP address )- select this option.
5: User Interface IP as Gateway
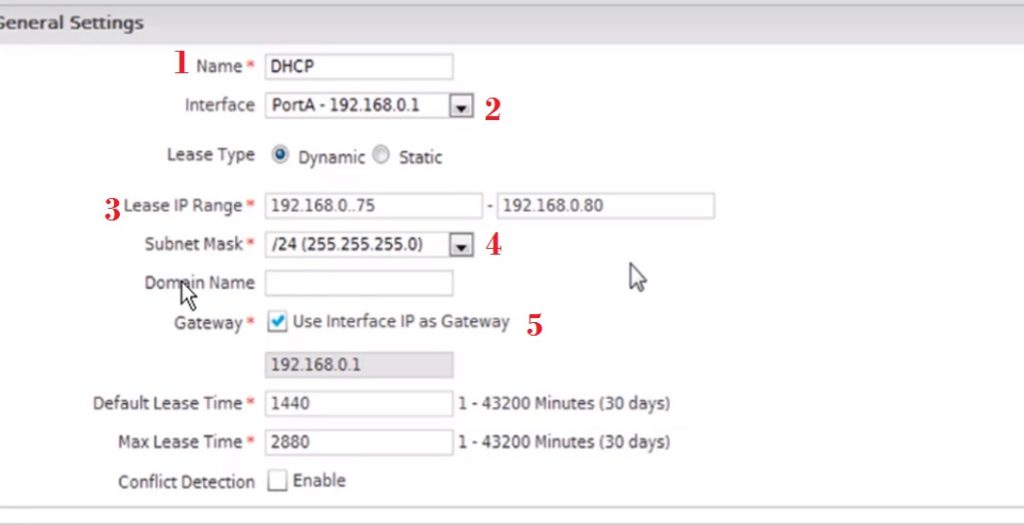
After all, settings press Ok button to apply settings.
Now turn your PC/Laptop LAN settings to DHCP mode. Your PC/Desktop should get an IP address from Cyberoam DHCP server as configured by you. There are many security setting need be configured in your firewall to protect your network from external attacks. In the next post, you will get the security configuration and URL/keyword filtering configuration.
Related Post
- The Best Wireless Mesh Network System Kit for Home
- Protect Network and Wireless Devices from Lighting and Thundering
- 10 best Open Source Operating System Alternative of Windows
- The 5 Important Tools for Design, Installation and Manage Fibre Networks
