LigoWave DLB 5-15ac Long Range Point to Point configuration
LigoWave DLB series is a 5 GHz outdoor point to point and point to a multipoint wireless radio for long-range connectivity. DLB 5-15ac is a gigabit wireless radio for up to 7 KM point to point and up to 5 Km point to multipoint wireless connectivity. DLB 5-15 is the outdoor radio with an integrated antenna and IP 65 outdoor enclosure to work on all weather. LigoWave DLB series best for CCTV and internet high throughput up to 500Mbps as per official website. The configuration of Ligowave DLB not very complicated but to get higher throughput and stable point-to-point connectivity configuration should be the best tune.
In this post, I will describe you step to step how to configure LigoWave DLB 5-15ac point to point configuration for long distance and higher interference area. The configuration of Ligowave DLB in Point to point required 2 DLB 5-15 radio and configuration in Point to Multipoint required at least 3 DLB 5-15 radio. To proceed your Ligowave DLB series point-to-point configuration ready your both radio and follow the steps below to setup a stable and reliable wireless connectivity. DLB 5-15ac having 1 Gigabit Ethernet with 24Volt PoE support.
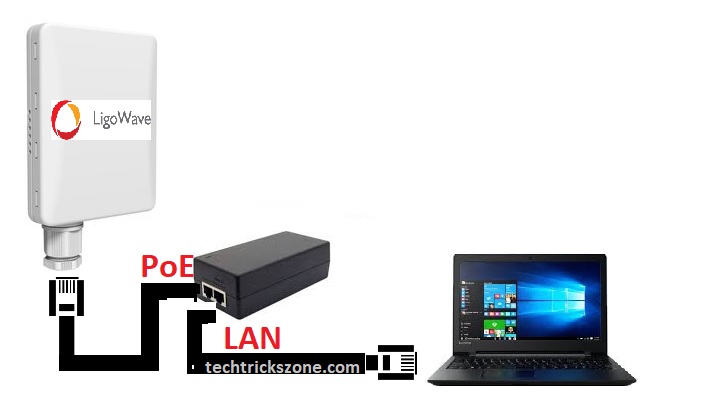
LigoWave DLB 5-15 Point to Point Connection Diagram
To configuration of DLB 5-15ac first required a physical connection to access the device on the web browser. Both side radio will be configured first on the table and after the successful point to point configuration and testing you can deploy on-site. To connect of LigoWave device take the PoE adapter comes with the device. Now take the device and connect the PoE out port to the device with the cat6 cable. Connect Lan port to Laptop/Desktop Lan port to access device on web browser to make configuration for point to point bridging. Power on the PoE adapter to get power on Ligowave DLB 5-15ac.
 The connection will be the same for both AP and Client device to the configuration on the table and for real sites. After connection, next steps is to access the Ligo wave device on Laptop and configure one device as AP+WDS and second device Client WDS.
LigoWave Point to Point Scenario
Point to point scenario of Ligowave DLB series, LigoWave infinity, or any wireless device almost same. One side device will be configured as Access Point WDS and the remote side device configure as a client WDS. Everything manages from Access Point WDS device such as channel, channel Width, the client will auto change the settings once connected access point device successfully. In this post, I will show you step to step how to configure Ligowave DLB series Point to Point and Ponit to Multi Point configuration. For point to Point Wireless connectivity Device configuration
1:- Location A – Access Point mode
2:-Location B- Client WDS mode
LigoWave DLB 5-15ac Default Settings and Login first time
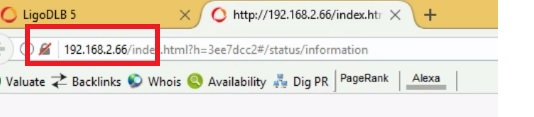
To access LigoWave device first required a default login setting. Get all brand Default settings here For LigoWave default IP Address is – 192.168.2.66 Default username and password = admin/admin Use the 192.168.2.x series IP address in Laptop/Desktop LAN port EXP- use 192.168.2.10 in Laptop LAN. See here how to configure the Laptop LAN IP Address. Open the Web browser and Type 192.168.2.66 and hit enter.
 Use admin/admin for default login You can change Language as per your country language.
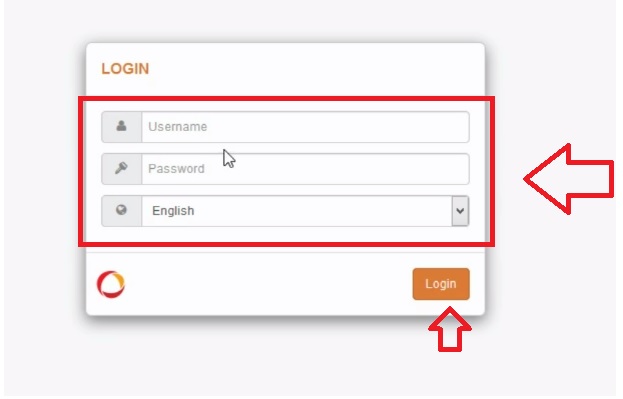
Agree to term & condition
Operating country– choose your country
5Ghz Antenna Gain– type your antenna gain in the box to compliance EIRP Usage scenario – use the Point to point or Point to multipoint
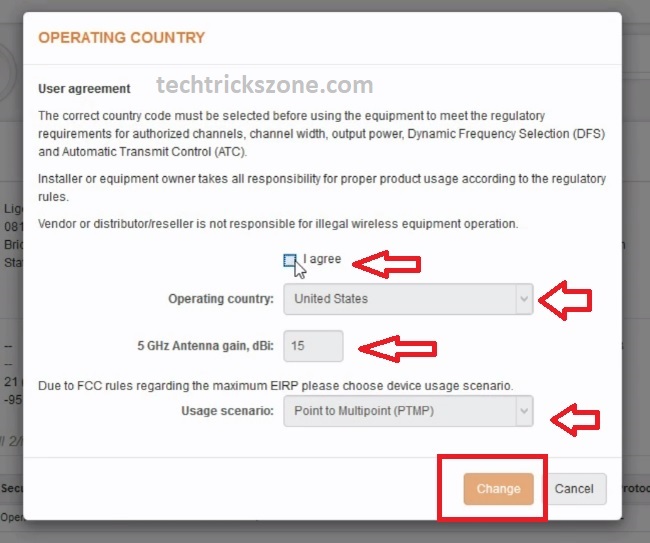 Click Change button to save settings After login now changes the LigoWave operation mode for next steps.
LigoWave DLB 5-15ac Access Point WDS Mode
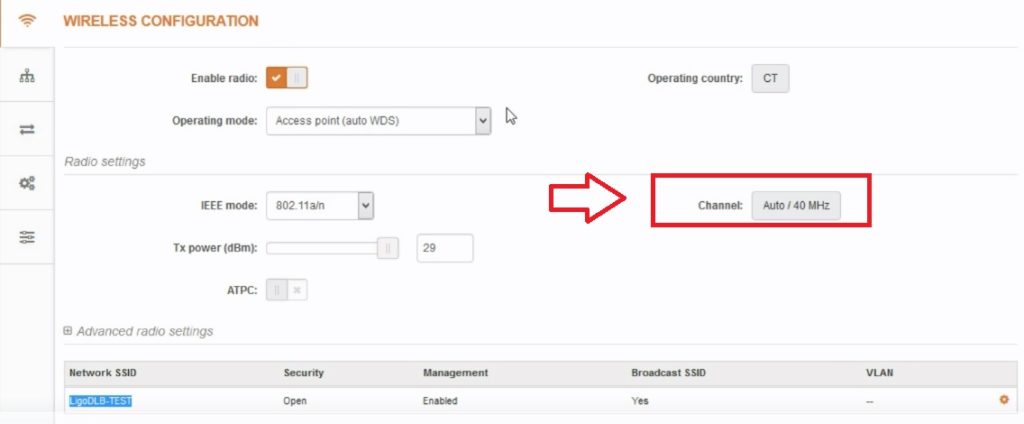
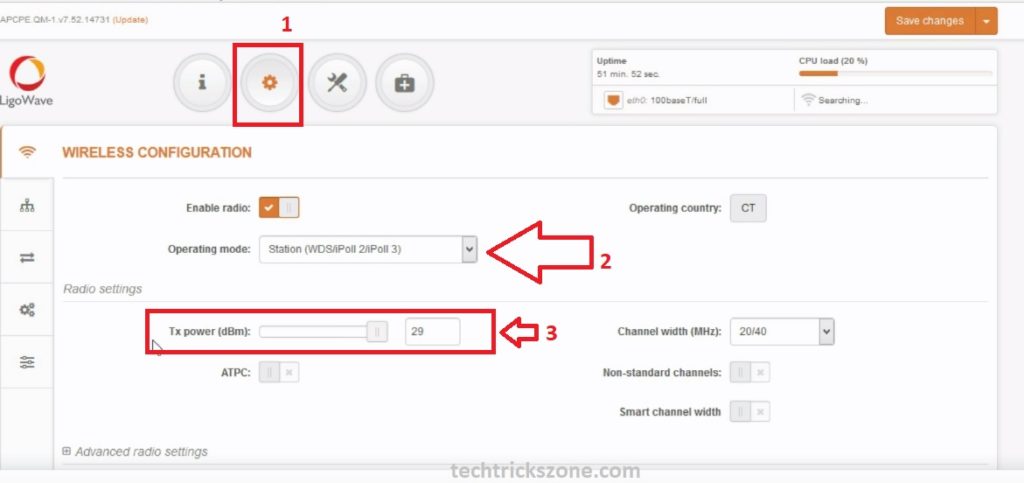
The first device will be the configuration as AP WDS mode to the configuration for Wireless point to point connectivity. To configure Ligowave in AP WDS mode follow the steps below. After login DLB 5-15 go to the setting gear icon of top menu. Operation Mode- choose Access Point WDS Mode 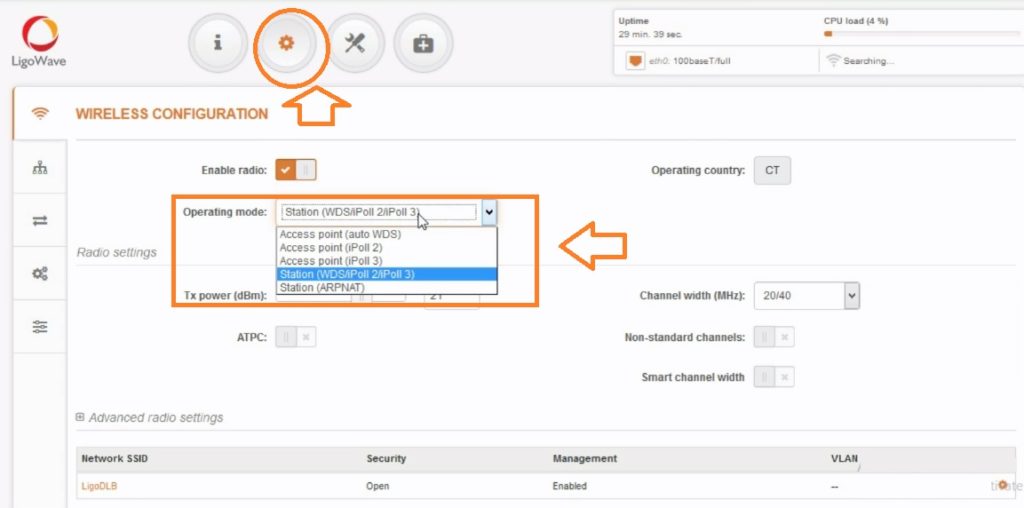
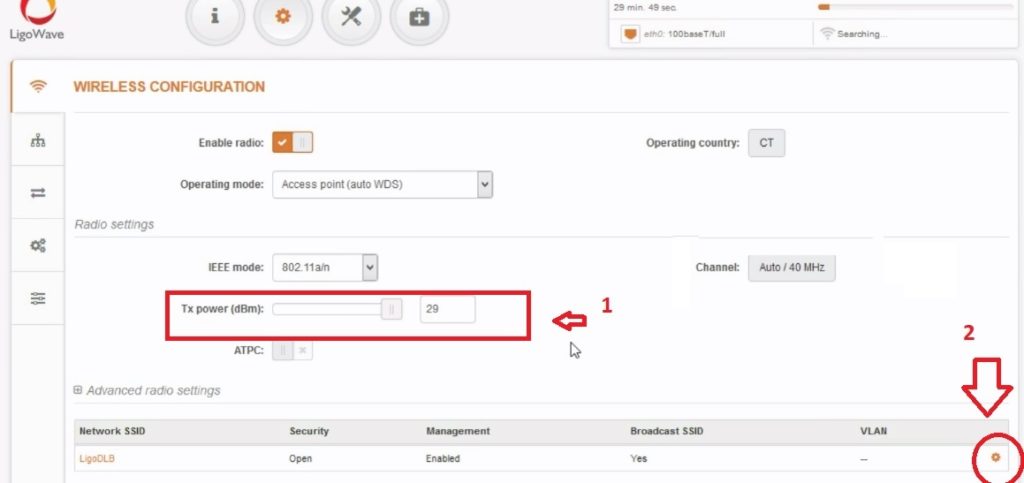
Now Increase or reduce the LigoWave AP device Tx power and configure the SSID and Security key.
- Tx Power- move the button to increase and reduce power as per distance of your Point to point.
- Click the Setting gear icon to change SSID name and configure security.
- SSID- use the network name to recognize your radio while scanning form remote site radio.
- Security- set security to protect your LigoWave Point to Point connectivity.
Click Done button to save changes. 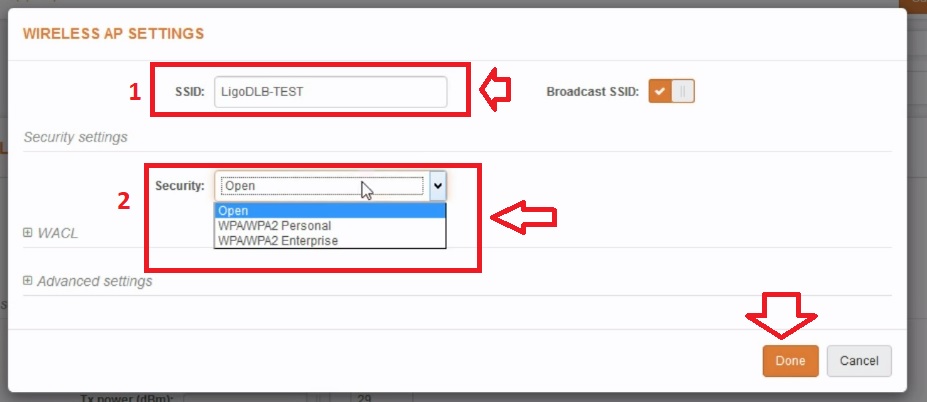
By default LigoWave DLB 5-15 Channel set as an Auto mode. If you are going to use LigoWave in a city where high interference area then use the manual channel selection. See below how to set the manual frequency in LigoWave DLB 5-15ac. Channel – Auto/40 Click and choose the manual channel.
After all settings on Access Point mode Device save changes to apply all settings. Click Save changes to settings take effected. 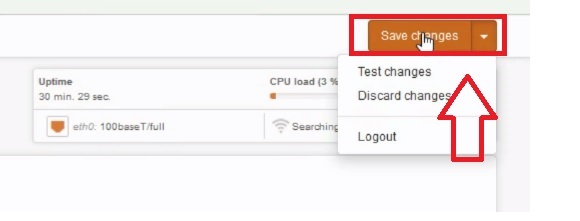
This the one side Device configuration of the point to point connectivity. Please keep Access point device on and connect the second device with Laptop.
2: LigoWave DLB 5-15ac Client WDS Mode Configuration.
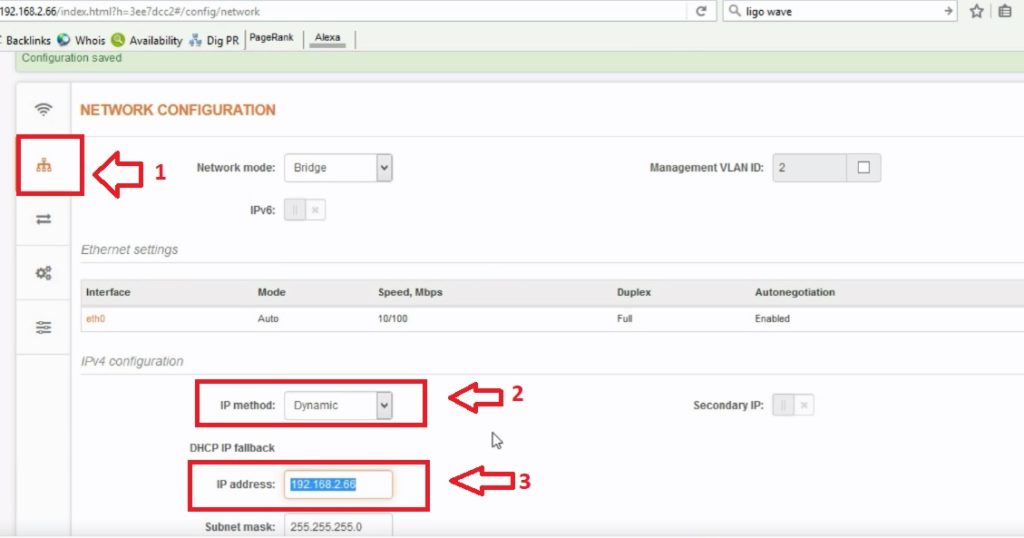
Now configure remote side Ligowave device with Client mode. Client mode will require LAN IP configuration, and other parameters the client will auto-detect from AP WDS. Login Device as follows above steps. After login change IP Address first because LigoWave both device comes with the default IP address. You can change both side’s IP Address according to your but both radios should have a unique IP address to avoid conflict issues. LigoWave DLB 5-15ac LAN IP Address Configuration. 1-To change Ligowave LAN IP address go to the settings option and choose second LAN icon from the left vertical menu. 2:- IP Method- choose static IP 3:- IP Address- change IP Address here
After change IP address you will get a pop-up notification to re-open LigoWave with a new IP Address. 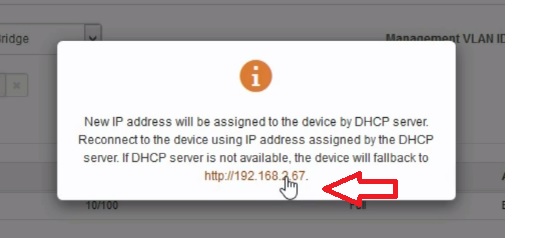
Re-Login LigoWave DLB 5-15 device to configure device as client mode.
- Click settings Icon
- Operation mode – choose Station WDS
- Tx Power- reduce and increase tx power as per location distance.
Click Save change to station mode. Now scan the client mode device for Access Point WDS device. Click Search Icon to scan your AP device from the client 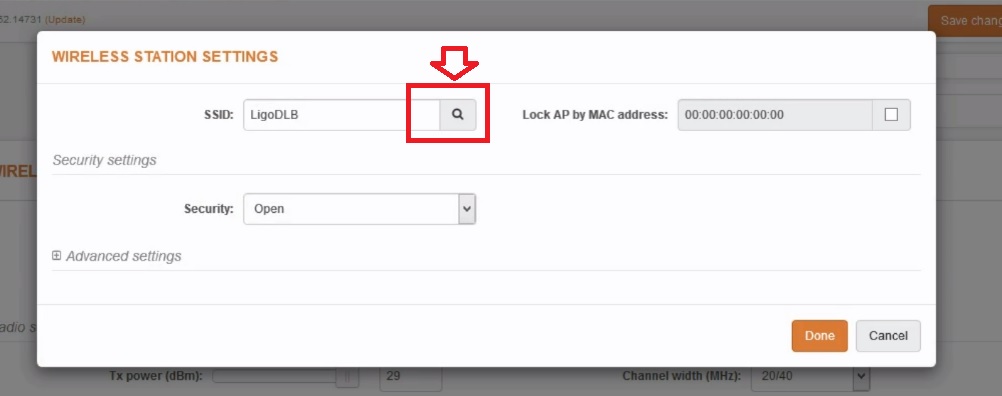
You will get many AP running on your area, choose your AP ssid from List and click the select button. 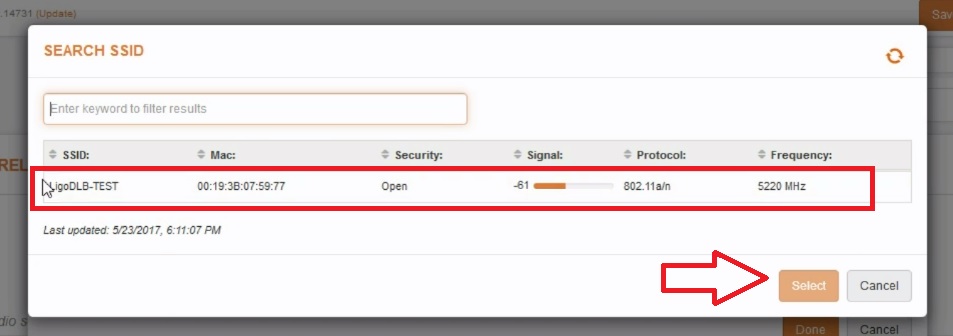
Lock AP by MAC address – check this option (locking mac will always keep connected to the same device. Click Done button 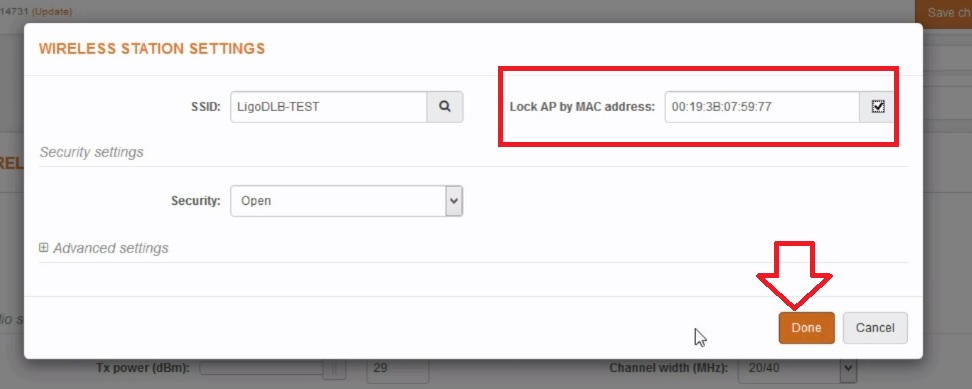 Click save change now to apply settings.
The device will start saving and reboot, this process takes 10-20 seconds. Wait until the device refresh again. Login and check the Point to Point connected status. Go to (i) information icon to top menu See the Wireless connected status. You can see SSID, Device MAC details, signal status, and link connected time. 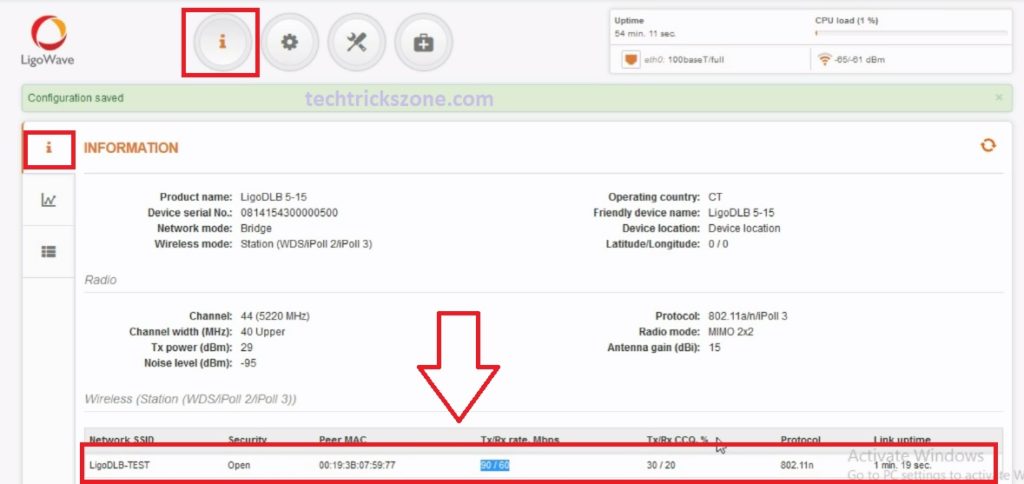
LigoWave DLB 5-15ac Point to Multi-Point configuration.
LigoWave DLB 5-15 configuration is the same as point to point configuration. You just need to repeat the client WDS again with the third device for the next location. You can connect multiple devices with repeating client WDS mode configuration.
Related Post
- How to Connect Any Wi-Fi without Password from Mobile?
- How to Configure UBNT Rocket M2 as Access Point Mode?
- Download LigoWave Firmware and Reset Tool Now
