ATSW-1000i High Power Outdoor Device AP mode configuration
ATSW-1000i is a 2.4 GHz high power outdoor AP with 14 dBi integrated mimo antenna. This device best for outdoor and indoor both hotspot solution like, campus hotspot, Hotel hotspot, coffee shop, pizza and many others. ATSW-1000i support Access point mode, Repeater mode, super WDS mode, Gateway mode and WISP for ISP purpose. Physically AP has 1 WAN and 1LAN 10/100 speed port. Both Ethernet support 24Volt PoE and 1DC socket support 12V 1A power. 1 Reset button available for hard reset device In case IP or password forgotten. 1 Small M, S (Main/ secondary) switch support direct Point to point configuration. Now see the complete user guide for ATSW-1000i High Power Outdoor Device AP mode configuration with simple steps.
How to Connect Any Wi-Fi without Password from Mobile?
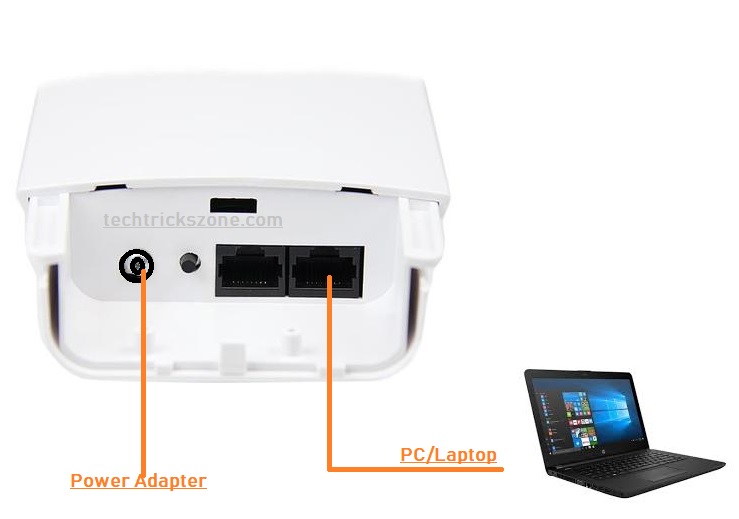
ATSW-1000i BGN Connection Diagram
As already describe your physical specification of ATSW1000i so you can use a DC socket with a 12Volt 1A power adapter to power on the device.
Connect Adapter pin in DC socket, LAN port to Laptop or Desktop LAN port with patch cord comes with device.
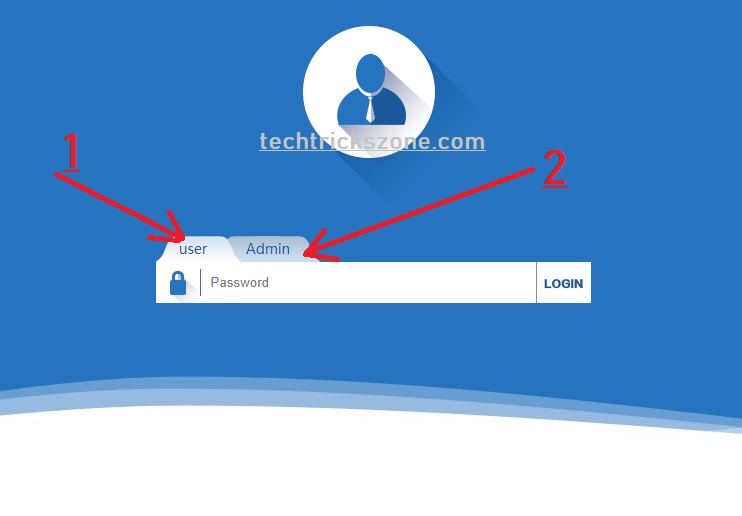
ATSW-1000i 300Mbps Wireless Access Point Login first time
ATSW-1000i Default IP – 192.168.188.1
Username- User / Admin
Password – admin/ root
Open web browser and type ATSW-1000i default ip and press enter button.

In ATS AP 2 account 1- user and 2- Admin
User- Fix to AP mode configured
Admin- you can change AP, Repeater, Wisp, Gateway mode with this user
Here we will configure Access point mode so
Use admin password to login device.
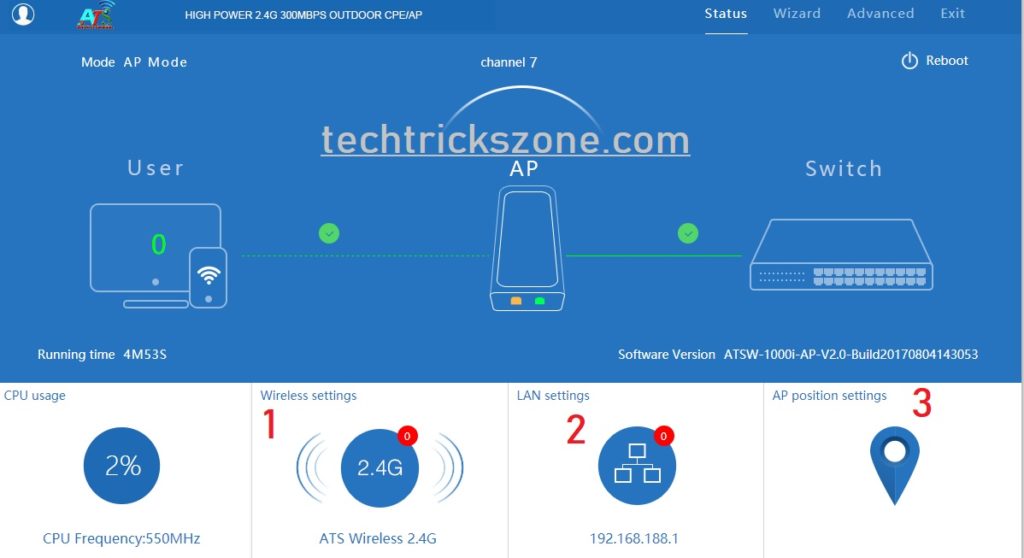
ATSW-1000i-BGN 300Mbps MIMO outdoor AP Dashboard.
After login devie you will land on Dashboard where you will get all configuration options.
- Wireless settings
- LAN Network settings
- AP location settings
ATSW- 1000i AP/CPE 2.4Ghz SSID and Password configuration.
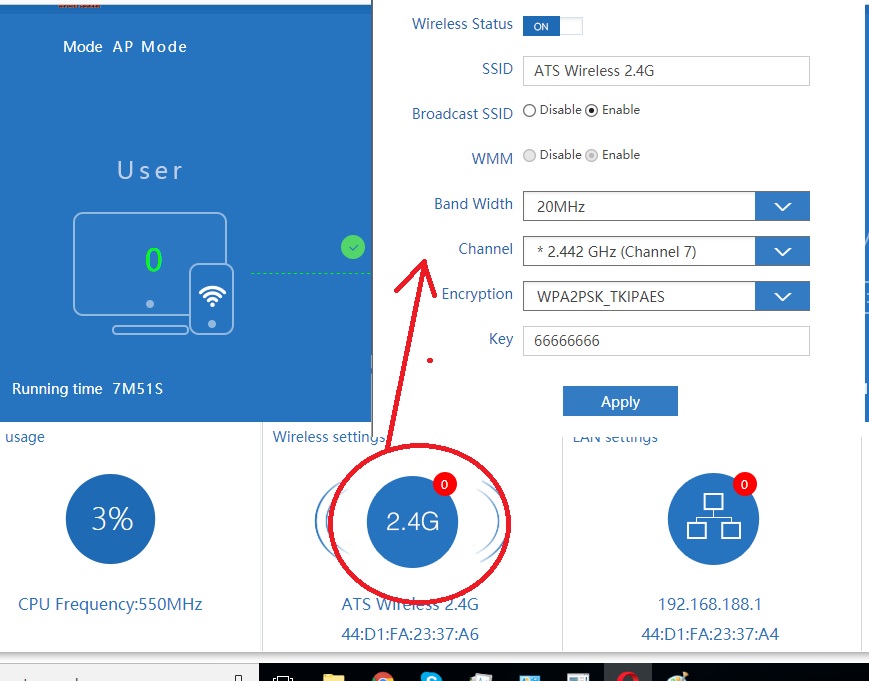
Wireless settings option you can change Wi-Fi name and password with channel.
Wireless Status- ON
SSID- type Wi-Fi name here you want to set for your wireless network
Broadcast SSID- enable
Bandwidth – 20/40 (use 20 if you internet plan less than20 mbps if its more than 40Mbps use 40.
Channel- use 1,6,11 channel sequence if using more than one Access point in same place.
Encryption- use WPA2/PSK_AES
Key – type Wi-Fi password here
Click Apply button to save Wireless settings.
ATS Wireless Access Point LAN settings.
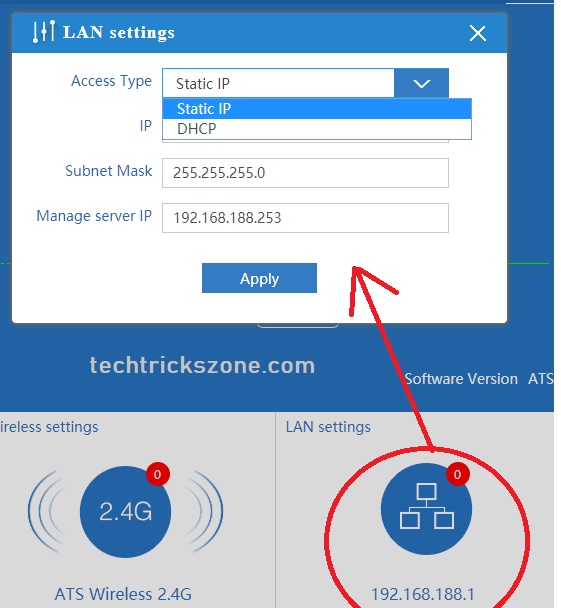
By default LAN settings is DHCP for controller detection. If you are not using any AP controller of ATS than you can use Static IP address.
LAN Settings.
Access Type- Static
IP- type new IP Address here
Subnet Mask- use subnet mask according to IP
Management server- use any IP
ATSW-1000i-BGN MIMO Access Point Location settings.
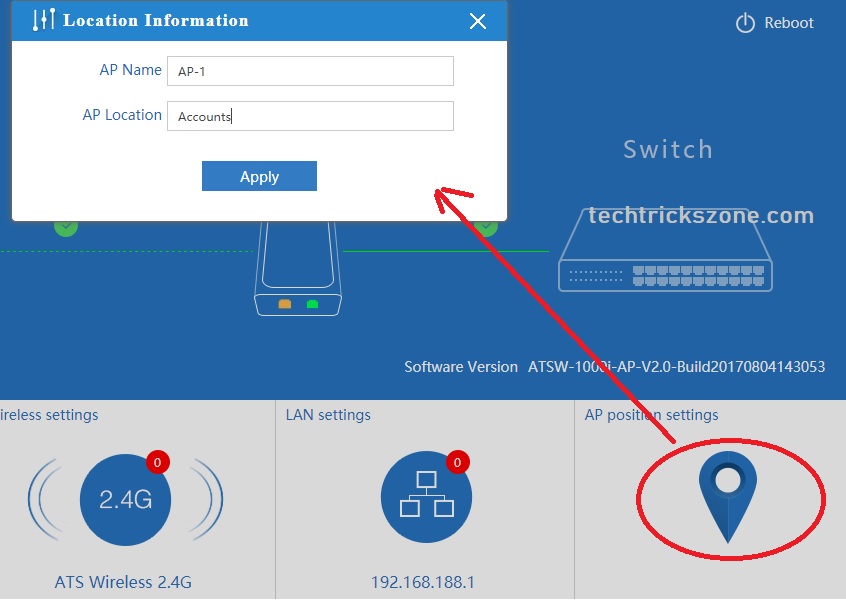
You can set AP location and Name to identify access point easily when you access web page to check AP.
AP Position Setting
AP Name- give name to your AP
AP location- set location where you have installed AP.
ATSW1000i-2.4Ghz AP Mac Access List configuration
Mac access list a part of wireless security. With enabling mac access list we can add an extra security layer on our Wi-Fi network. Mac Access list divide into two part. 1 – Allow Mac added only 2- deny Mac added only.
Follow the steps to add Mac access list security in ATSW access point.
Go to Advanced option from right side top menu

- Go to Wireless
- Access Control
- Choose the Access Control type :
Mac Access All – this setting anyone can connect to WiFi network
Allow Listed– If the Mac address of mobile and laptop will added to this list only can connect to Wi-Fi
Deny Listed- Mac address added to this list cannot connect to WiFi only.

Choose the Mac Access type you want to use and start adding Mac address of users.
Type Mac and press ADD
If WiFi user canned than you can just import from Association STA List directly to Access Control List.
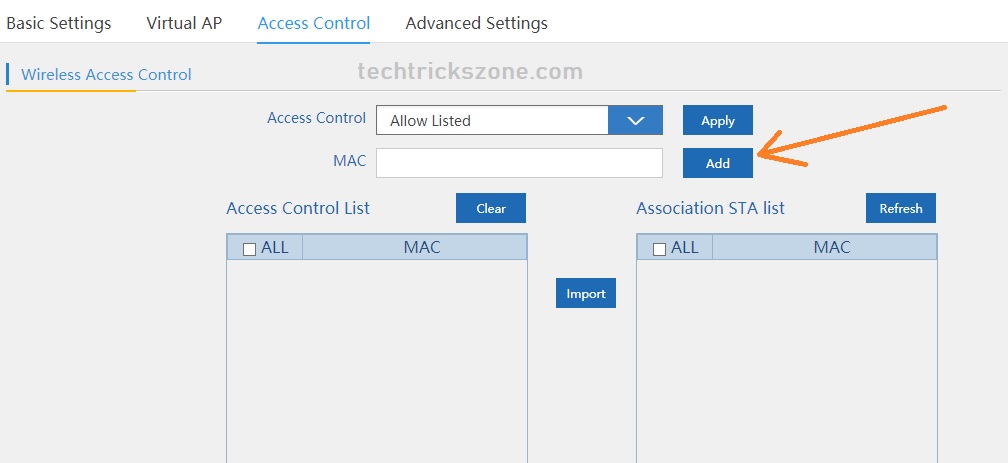
After Done click Apply and check the user working Mac list or not.
If you have any queary regarding “ATSW-1000i High Power Outdoor Device AP mode configuration” please comment or mail on contact us
Related Post –
- How to use WhatsApp without Phone Number with Tricks (2018)
- 5 Best Long Range Wireless Point to Point Device for Internet and CCTV
- How to design OTP Based Authentication Hotspot Solution for Coffee Shop
