DMZ configuration in OpenWrt Wi-Fi Routers
DMZ feature mostly required to access private IP addresses from the public network using the DMZ option. You can access your NVR and DVR from any location using the internet for live view.
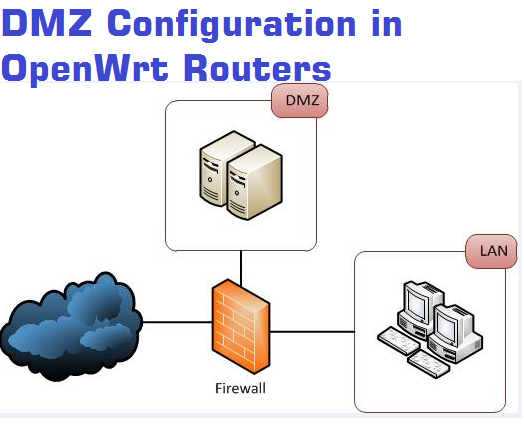
What is DMZ
Before using DMZ or port forwarding configuration you should know “what is DMZ ? and what is the DMZ use in the network.
DMZ full form is a “demilitarised zone” it’s also called “perimeter network” The purpose of a DMZ is to add an additional layer of security to an organization’s local area network (LAN). After Enable DMZ setting its authorized direct access to an external network without accessing other parts of the network. In other words, we can say DMZ create a terminal to direct access from an external network which LAN IP Address we authorized to access.in openwork there is no option for DMZ configuration but with port forwarding, you can use DMZ settings. this read will teach you DMZ configuration in OpenWRT
- How to Connect Any Wi-Fi without Password from Mobile?
- How to check who is using your Wi-Fi from Mobile (3 Way)
Services use in the DMZ!
most common of these services are used for DMZ which is being provided to an external user.
- Web servers
- Mail servers
- FTP servers
- VoIP servers
Port Forwarding For DMZ use in OpenWrt
- Default Ip- Address is 192.168.1.1
Put Same Series IP-Address in PC/Laptop (Ex: 192.168.1.x)
Open Internet Browser and type 192.168.1.1 in the address Bar.
Default Username: root
Password: blank(no password)
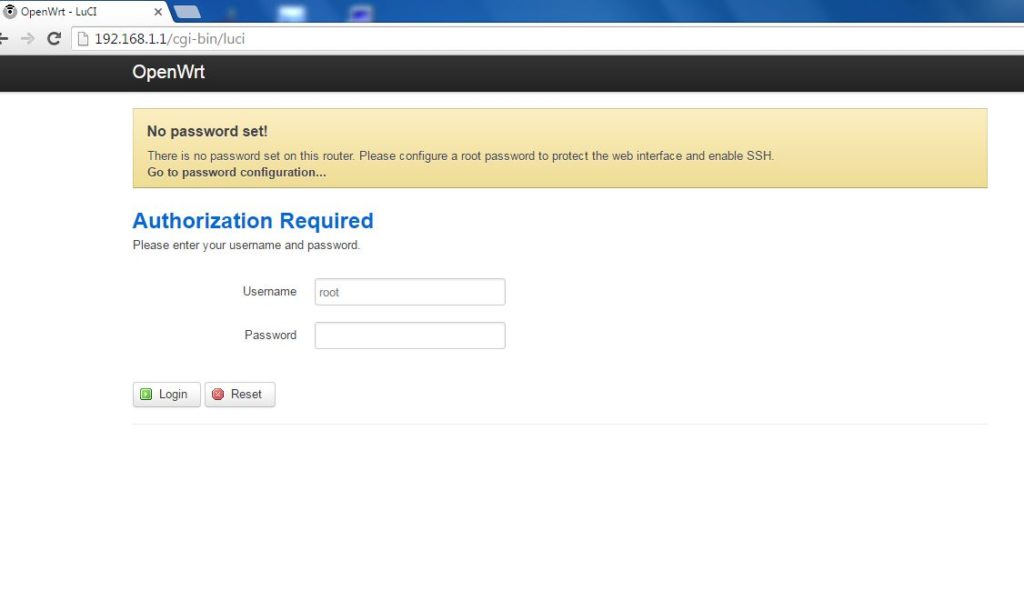
Click Login to DMZ configuration in openwrt
Pr-Required Configuration for port forwarding
1. Wan Network Should Configure with Public IP Address.
2. If Using WISP Client Router Mode then WWan should Configure with Public IP.
3. You Should know the Port Number of Service You want to be forwarded for access from the external network.
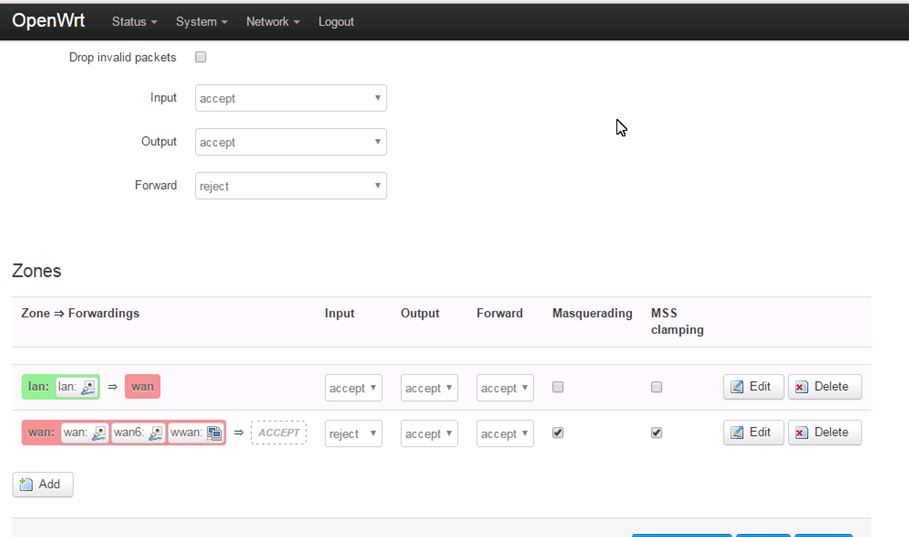
Firewall Setting
Go to –> Network –> Firewall
- Zone –> Forwarding
- Wan WWan — Input = Reject | Output = Accept | Forward = Accept
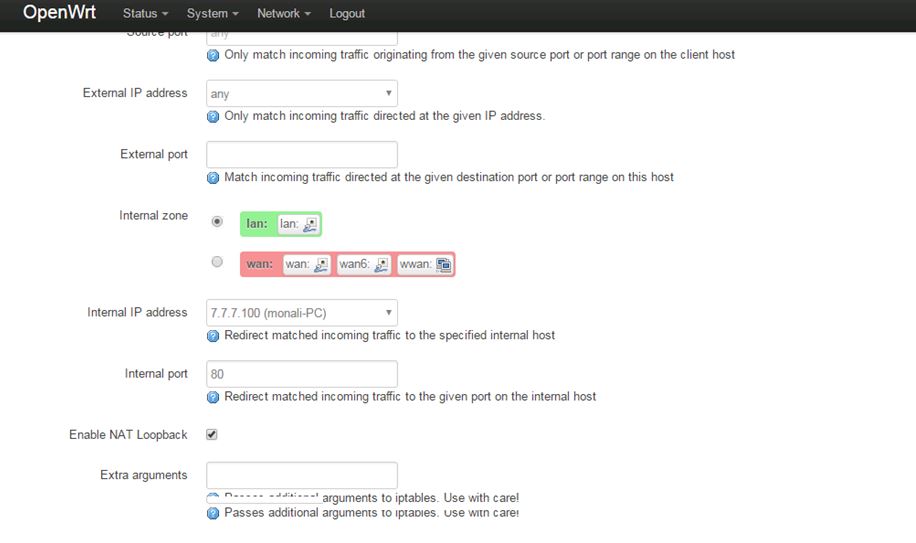
New Port Forward Settings
- Name = Put the name of service (EXP: WEB SERVER )
- Protocol = TCP+UDP
- External Zone = WAN
- External Port = – (Leave it blank)
- internal Zone = LAN
- internal IP Address = put your Lan Ip which you want to access from the internet
- internal Port = Assign Port Number of Application or Server you want to access (Exp: for HTTP use 80 port)
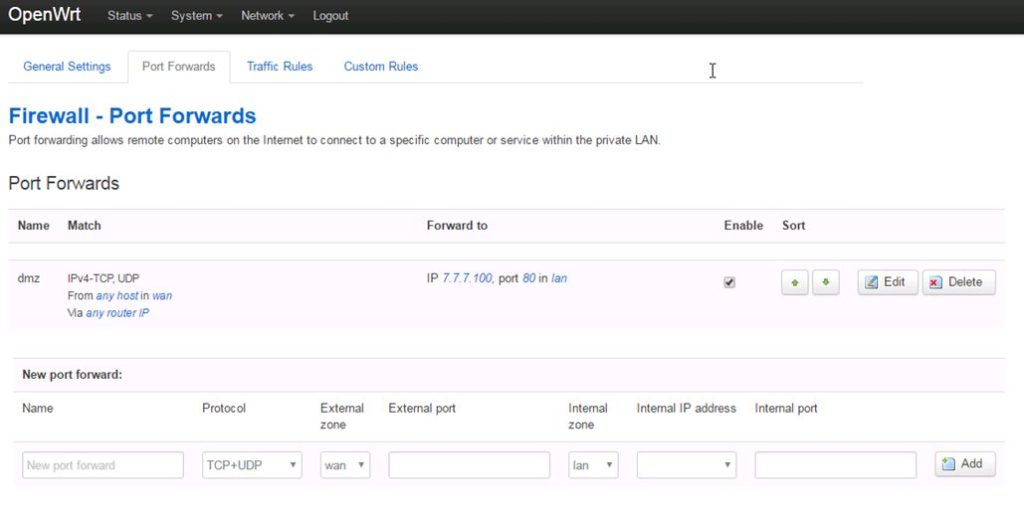
After Fill all options Click Add Button
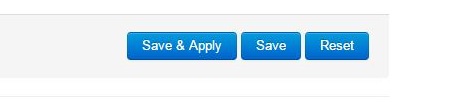
Click Save & Apply For Settings Change.
Related Post
- How to block any Website and Apps on basic WiFi Router
- How to use WhatsApp without Phone Number with Tricks
- How to recover a forgotten Wi-Fi password From PC and Mobile.
- How to design OTP Based Authentication Hotspot Solution for Coffee Shop
