MAnaging and monitoring Access point from a single point is a great way to avoid network error and complications. Mikrotik CAPsMAN a free access point controller system for all Mikrotik AP and routers. see here a simple user guide to starting your AP monitoring and managing with Mikrotik CAPsMAN Wireless Controller Configuration with pictures.
Mikrotik CAPsMAN Wireless Controller Configuration and Setup
CAPsMAN stands for Controlled Access Point system Manager which allows centralization management and configuration of the wireless network. It makes a bigger wireless network easy to manage and configure with a single point. CAPsMAN supports the single point firmware up-gradation, logging, seamless roaming data logs and other function which make access point management easy.
CAPsMAN support on the Mikrotik Access point and can run with any RouterOS device from v6.11 firmware version and no wireless interface required. To use the CAPsMAN feature device should at least Level4 RouterOS license. CAPsMAN can run with NAT as well as bridge mode and no IP configuration necessary at AP side.
Limitations of CAPsMAN
Unlimited CAPs (access points) supported by CAPsMAN.
32 Radios per CAP can manage.
32 Virtual interfaces per master radio interface support.
The configuration of CAPs simple and easy and it should use when using more than 10 Access point in the single network. Monitoring and managing wireless network quite easy and fast roaming network while moving one AP to next AP.
Requirements
You can use any device with router OS v6.11 and upper with a level 4 license. CAPsMAN can run inside the Access point itself if not want to use any dedicated router for Controlled Access Point system Manager.
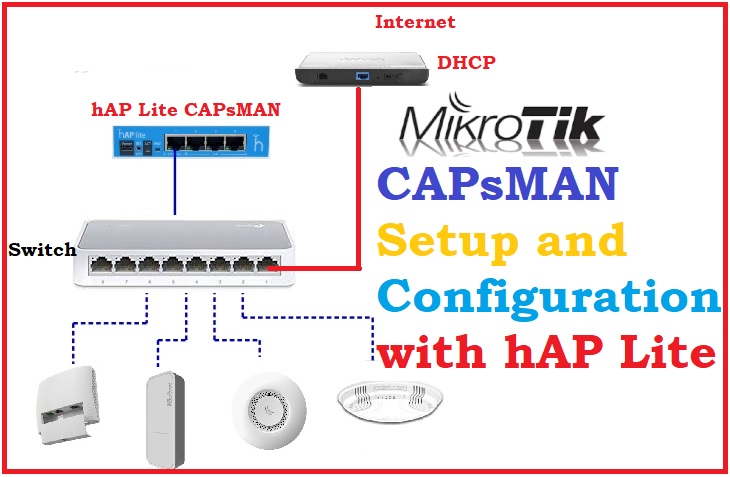
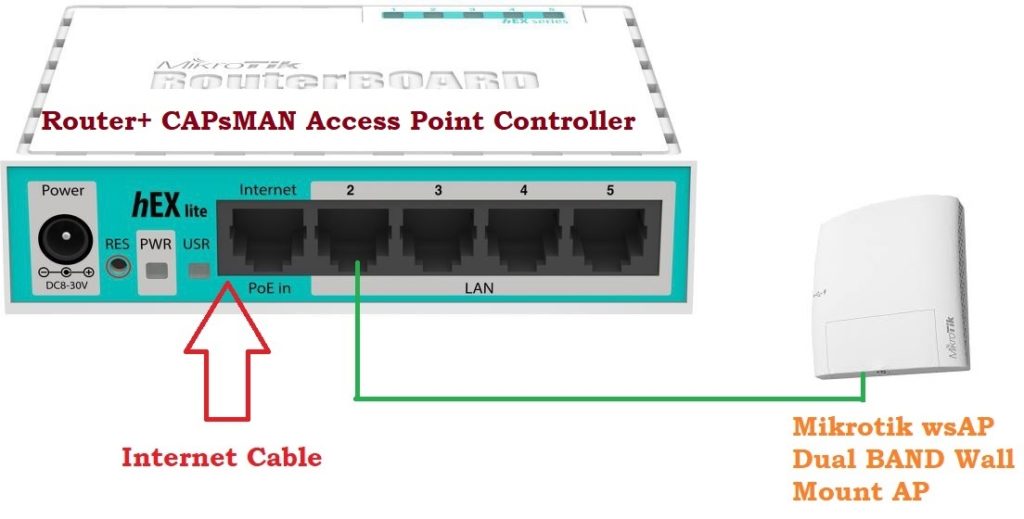
CAP to CAPsMAN Connection Physical Diagram
I am using Mikrotik RB-750Gr router board to configure CAPsMAN.
My internet comes in INTERNET port (E1) and CAP controller out the interface is Ethernet 2.
Mikrotik Controlled Access Point system Manager configuration steps
The configuration of the Controller in Mikrotik divide into 2 parts.
1: CAPsMAN configuration
1.1: Enable CAPs Manager
1.2: Add Channel
1.3: Add DataPath
1.4: WiFi security config
1.5: Wireless config
1.6: Provisioning rules
2: Access Point configuration
2.1: Enable CAPs
2.2: Configure the CAPs interface and discovery interface
Read More:
- How to design OTP Based Authentication Hotspot Solution for Coffee Shop
- How to block a Website and Apps on basic WiFi Router
- Best Dual Band WiFi router under 2000 Rs for 100+ Mbps Internet Plan
follow the steps to setup the Mikrotik controller for your Access point centralize management server.
1:1 Enable Caps Manager in Router
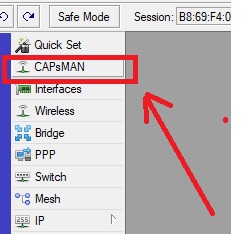
Login your Mikrotik Router board Device with Winbox.
See the CAPsMAN option in the left side menu second option
If no CAPsMAN option in menu please make sure your firmware version router OS v6.11 or upper. Try upgrading your router if not find.
1: Now Go to CAP interface.
2: Click on the Manager Button.
3: Enable: checkbox to enable and press apply ok button.
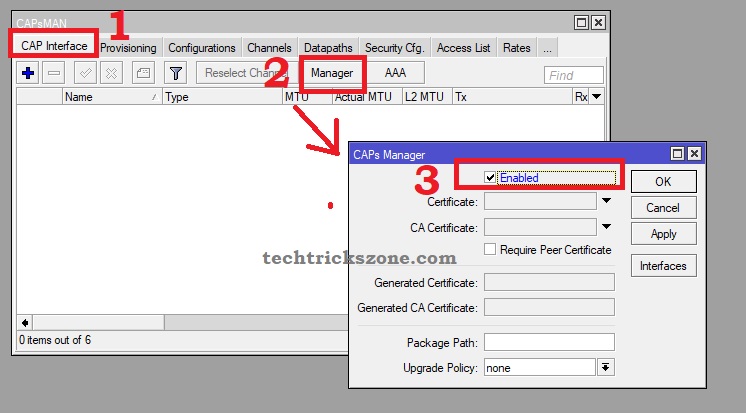
After Enabling CAPs now proceed next steps.
1.2: Add Channel for Mikrotik CAPs
Now add the channel to provide for AP in the network.
If you are using Dual-band Access point and Single-band AP please add both band channels. Here I am showing only 2.4 GHz channel adding. Repeat the same steps to add more channels and bands.
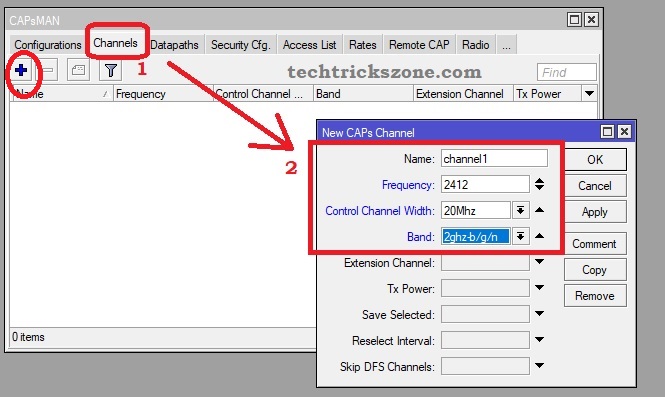
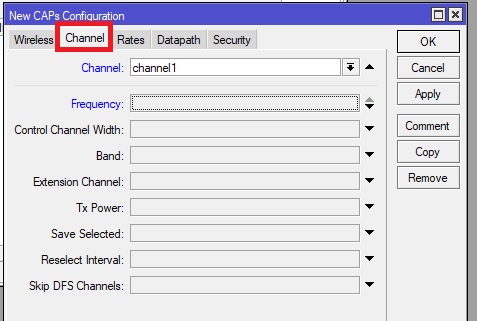
1: go to Channel tab and press the plus (+) button
2: New CAPs Channel – Name– type the channel name
Frequency – type frequency. Use 2412,2437 and 2462 for 2.4 GHz to avoid overlapping.
Control Channel width: if your network bandwidth less then 50 Mbps use the 20 else use 20/40 MHz
Band: for 2.4 G use 2 GHz b/g/n and for 5G use 5Ghz a/b/n/ac
Press the Apply button to save.
1.3: Add DataPath to Caps
Data path to decide how your traffic goes to Access Point, you have to choose interface here to select datapath CAPs controller to CAPs AP.
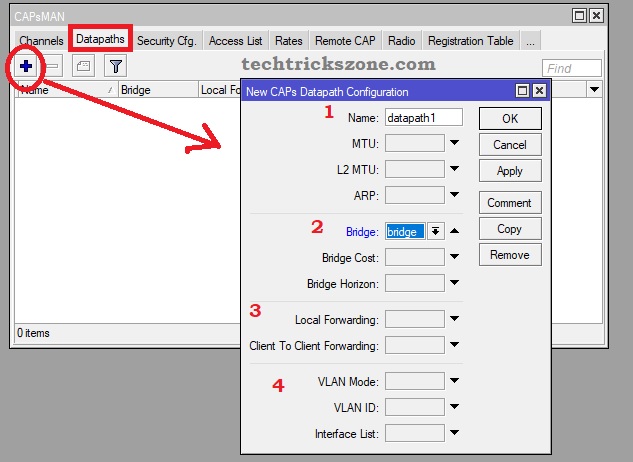
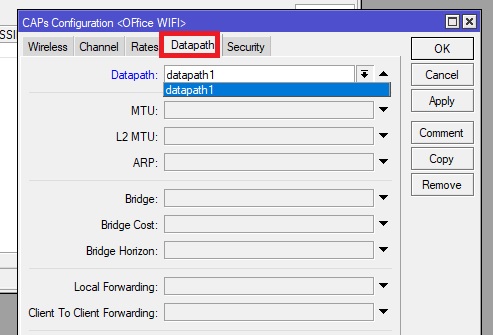
Go to the Datapaths tab and press the Plus (+) button
New CAPs Datapaths Configuration –
1: Name – give the name you want to for datapaths
2: Bridge: select the interface you have added in Bridge to connect your Caps AP networks. If you are using the router with more than 3 LAN port use the bridge to use all port in bridge paths.
3: Local forwarding and client to client forwarding rules ( if you want to create any forwarding)
4: IF your network running in VLAN you can use VLAN id and VLAN Type with this option to use multiple services.
1.4: WiFi security configuration for CAPs
Security is the most important part of configuration because it is provided you a secured wireless networks.
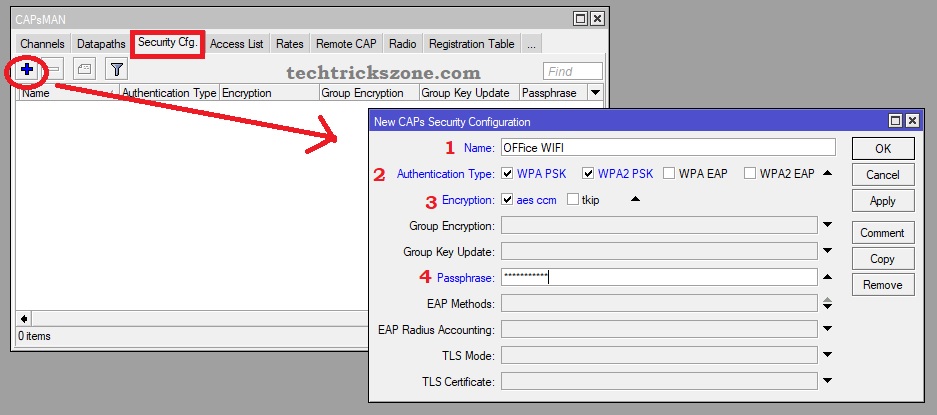
Go to Security cfg. Tab and press the plus (+) button
New CAPs Security Configuration
- Name: use the name for security profile ( EXP- 2.4G security key)
- Authentication Type: use WPA PAS and WPAS2PSK ( recommended)
- Encryption – use aes CCM
- Passphrase: type password here
Press Apply and OK button to confirm
To add security for 5 GHz wireless repeat the same steps again with plus (+) button.
1.5: Wireless configuration CAPsMAN.
Now the step to configure wireless SSID and wireless name which trigger to CAPs access points.
Inside wireless, we have to choose the configured parameter like security profile, channels and data paths. So wireless configuration has 3-4 tabs to configure.
Go to the configuration tab and use the + plus button to add Wireless settings.
1: Wireless
Name: type the name of the WiFi network to identify in the controller.
Mode– AP
SSID: Type the Wifi name to connect from mobile
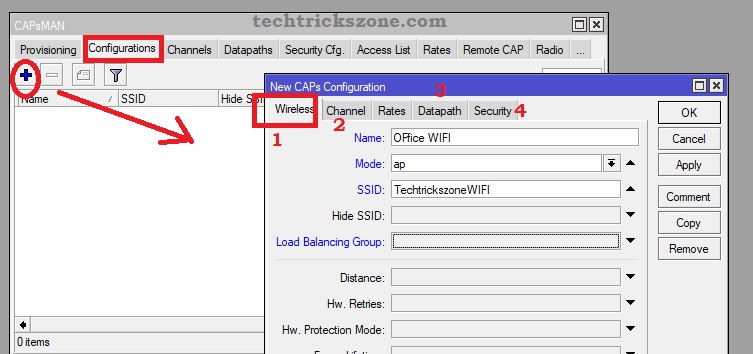
2: Channel
Now click on the channel tab to and choose the channel you have added.
3: Datapath
Now click on “Datapaths” tab
Choose the Datapaths you have created.
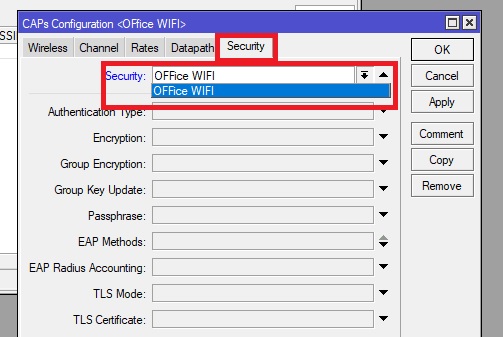
4: Security
Go to the Security tab to select the security profile you have created for both the wireless bands.
Select the security profile you and click Apply OK
Now the final steps provisioning will configure CAPs controller side.
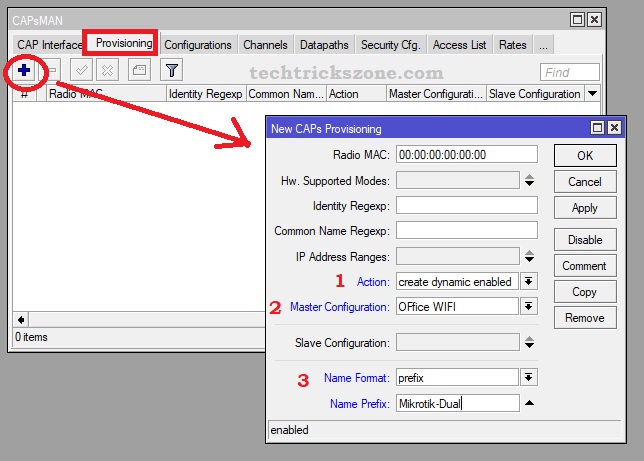
Click to Provisioning tab from CAPsMAN
Press the + Plus button to create new rules.
Radio MAC: keep this as it is ( it will show AP mac in the list)
- Action: choose to Create dynamic enabled
- Master configuration: select the Wireless configuration you have created
Salve Configuration: this is for Virtual AP configuration (if any VAP configuration)
- Name format: choose the name you want to get in Caps register AP list.
Till now your Controller side configuration completed. Now the configuration of the AP side required.
2: Access Point configuration for CAPs
Login access point with Winbox and follow the steps to enable CAPs.
2.1: Enable CAPs
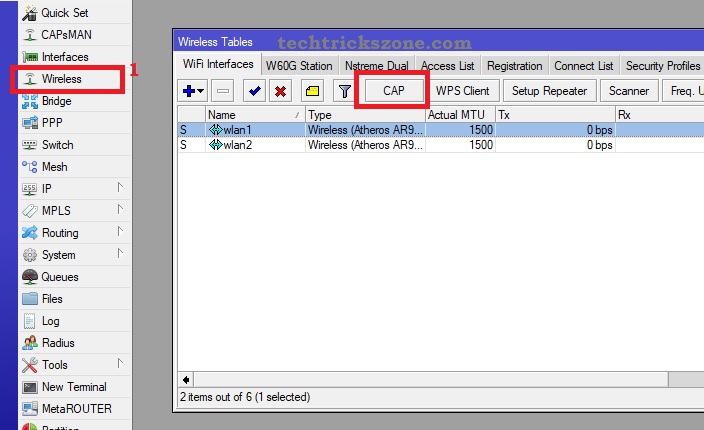
After login click the Wireless from left side setting menu.
Press the CAP button as shown below image.
Enable the CAP with check the box
1: Interface: choose the Wireless interface to Enable CAPs
2: Discovery interface: select the interface you are connecting AP to switch from CAPsMAN controller accessible.
3: Bridge: choose the mode interface. If you have created a different bridge on Bridge option selected the same.
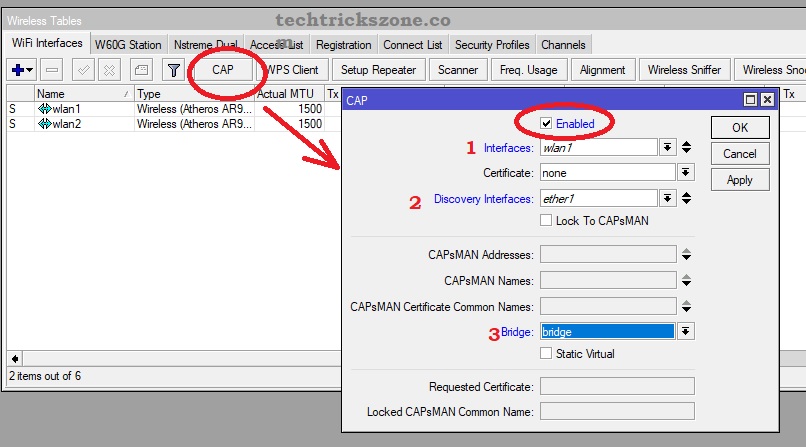
Apply and OK after all settings.
If you are using Dual-band Access Point than repeat the CAPs enable setting again for WLAN2 interfaces.
After enabling CAPs on Access Point interface will be disabled and managed by CAPsMAN controller.

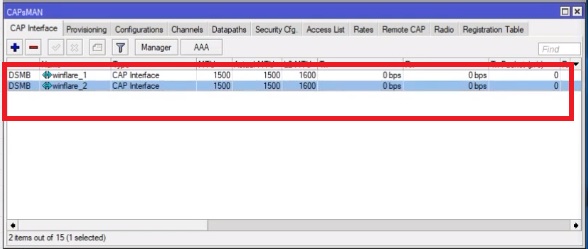
After a few minutes, you can check in your controller AP will start showing in CAPs option.
Conclusion:
CAPsMAN is the excellent way to manage your larger wireless network from the centralized location without physically monitoring device up and down status. It allows you to upgrade reboot, reset and configuration from single points. So if you are using more than 10 Access point must use CAPsMAN access point controller to make an easy network. to setup and configuration tutorials see Mikrotik CAPsMAN Wireless Controller Configuration complete in this post.
Related Post:
- 5 Best Long Range Wireless Point to Point Device for Internet and CCTV
- How to setup QoS to set internet Speed limit for WiFi User
- Mikrotik Hotspot Gateway Configuration with Router OS from Winbox
