TP-Link EAP225 Dual Band Ceiling Mount AP Configuration
TP-Link EAP Ceiling mount AP series is an indoor access point for the hotel, café, school, and home wifi solution. Although the post is for TP-Link EAP225 Dual band ceiling mount access point configuration but support for all EAP series models. You can use this configuration guide to configure EAP330, EAP320, EAP245, EAP110 EAP225, and EAP115models. EAP series work with and without the controller for standalone hotspot and centralize hotspot control solutions. TP-Link Omada EAP225 having Giga interface and dual-band WiFi for better speed and seamless network.
EAP series best solution for home and hospitality Wi-Fi solution which matches the interior with the classic look of AP. TP-link eap225 having double PoE power option either 24 volts passive PoE adapter or 48 volts PoE switch with 3af compliance. All the EAP ceiling mount model having classic and attractive looks for a match with your home interior and any other such as hotel, cafe, classroom.
TPLink controller fully supported centralized configuration and management for all EAP ceiling series while using multiple models in the same location. The AP having an inbuilt captive portal option to redirect your visitor to your official website or social page to make your social popularity faster.
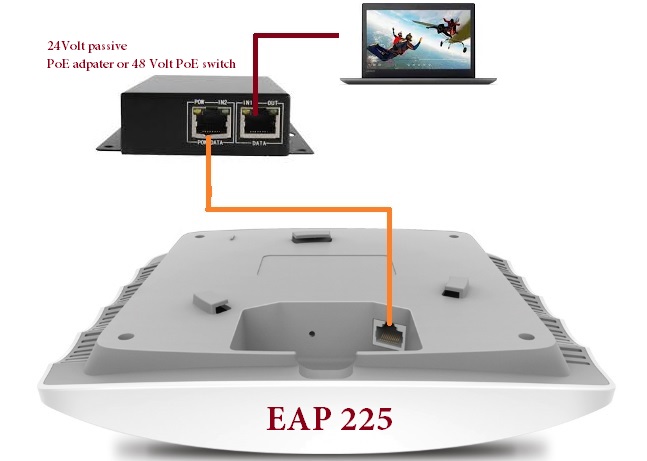
TP-Link EAP225 Ceiling Mount AP Connection Diagram
To configuration and setup EAP ceiling mount access point required a physical connection with POE switch or PoE adapter.
EAP ceiling mount AP series support 24Volt passive PoE as well as 48 volt 3af PoE switches to power on. You can use anyone to configure the device.
Connect PoE out from PoE adapter to EAP225 LAN port to power on using 4 Pair cat6 patch cord. Connect PoE adapter LAN port to PC/Laptop to make web interface access.
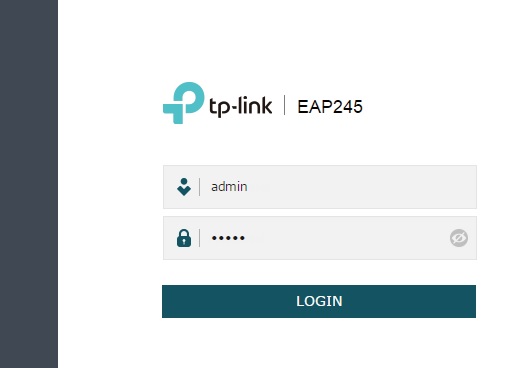
TP-Link EAP225 Ceiling Mount Dual Band AP Login First time
To login EAP ceiling mount AP doesn’t have any default IP address so you can access it using the domain name or use the DHCP server running on the networks.
Make your Laptop/Desktop LAN IP address into DHCP mode first.
See here how to configure LAN IP Address in PC
Default Access URL for TP-Link EAP Ceiling Mount AP is
http://tplinkeap.net
default username/password – admin/admin
Type the URL in browser address bar and hit enter.
Use the default username password to login device.
EAP225 Ceiling Mount Access Point Default username password Change
After login, you must change the default login details to ensure your device security.
Type the new username and new password in second steps during first time login of your TP-Link EAP225 Ceiling mount AP.
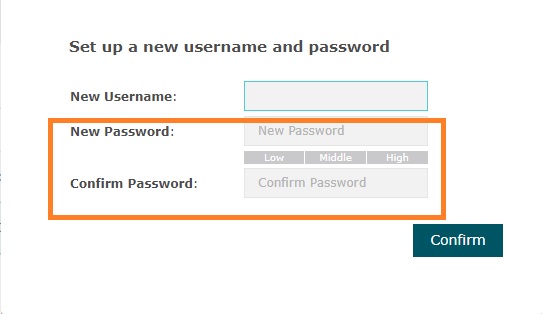
Press confirm after filling all the details.
- TP-Link Deco M5 Mesh WiFi System Setup and Configuration (with Picture)
- TP-Link Talon AD7200 Multi-Band Wi-Fi Router Setup and Configuration
- How to Connect Any Wi-Fi without Password from Mobile?
EAP225 Ceiling Mount Access Point Wi-Fi Configuration
EAP225 Model having dual-band Wi-Fi interface with 2.4GHz and 5.8GHz. While configuring wireless both interface should configure properly to avoid low performance and other stability issues.
This tutorial, the wireless interface will configure one by one.
1: 2.4 GHz Configuration
Go to the Wireless tab from the top menu.
Choose the 2.4GHz as selected in below image.
2.4GHz Wireless Radio – Enable
Channel Width – 20/40 ( choose both widths to auto to choose bandwidth speed)
Channel: use the 1,6,11 channel if using more than one access point.
Tx Power(EIRP): choose the Tx power as per area you want to cover.
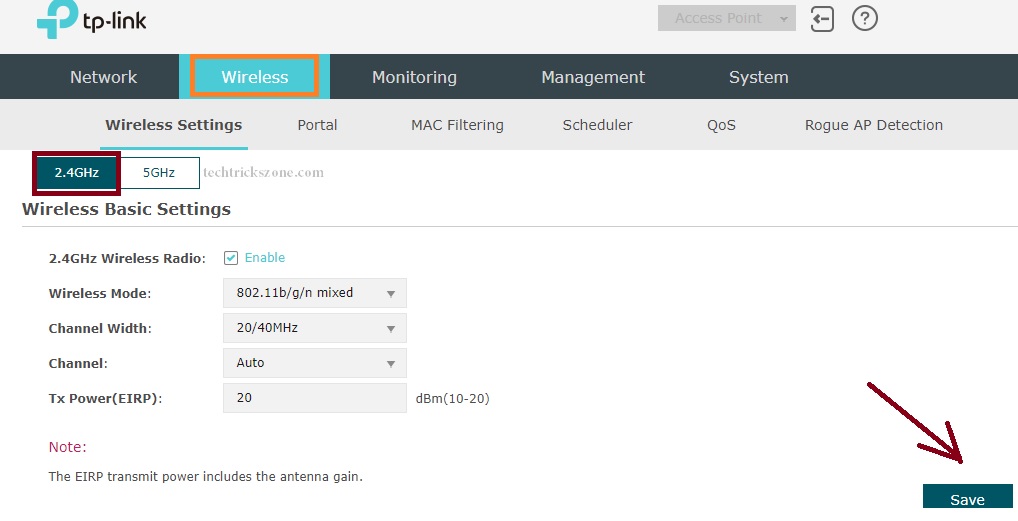
Click Save button and scroll page to below for SSID and WiFi configuration.
1: Click the Edit button.
2: SSID: change the WiFi name for 2.4 GHz adapter.
3: Security Mode: WPA-PASK (Recommended)
Version: WPA2-PSK
Encryption: Auto
Wireless Password: type the Wi-Fi password in this box.
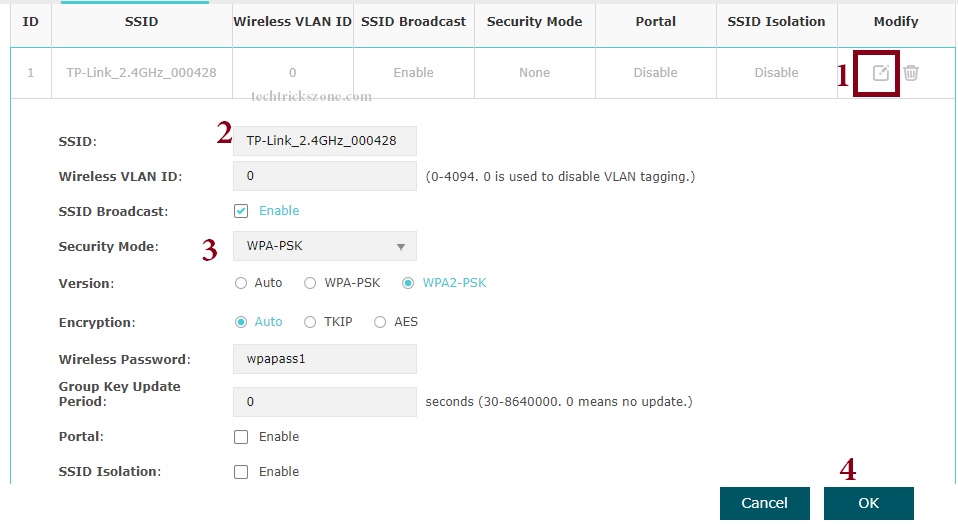
4: Press OK button save settings for 2.4 GHz in TP-Link EAP225.
2: 5 GHz Configuration
Go to the Wireless tab from the top menu.
Choose the 5 GHz as selected in below image.
5 GHz Wireless Radio – Enable
Channel Width – 20/40/80 (choose both widths to auto to choose bandwidth speed)
Channel: Auto channel.
Tx Power (EIRP): 27(choose the Tx power as per area you want to cover).
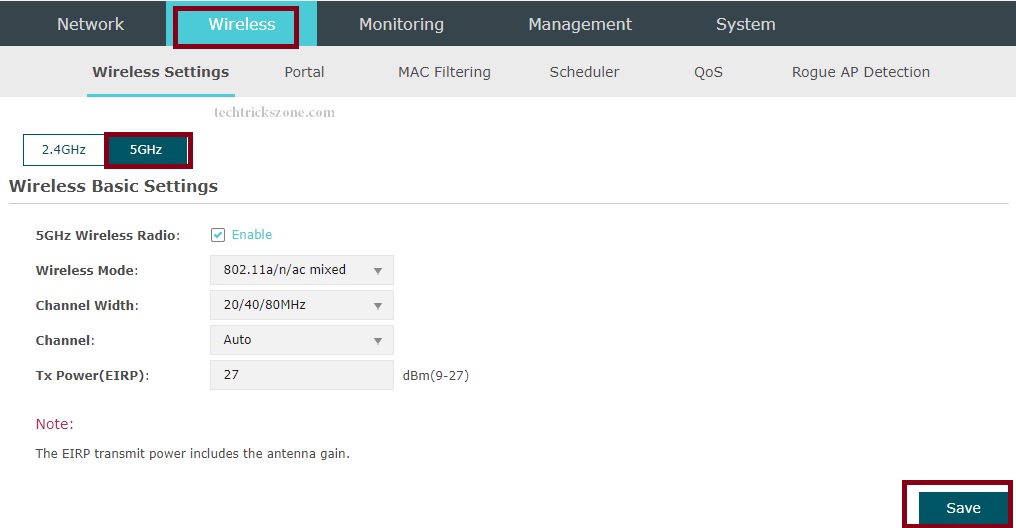
Click Save button and scroll page to below for SSID and WiFi configuration.
1: click the Edit button.
2: SSID: change the WiFi name for 2.4 GHz adapter.
3: Security Mode: WPA-PASK (Recommended)
Version: WPA2-PSK
Encryption: Auto
Wireless Password: type the Wi-Fi password in this box.
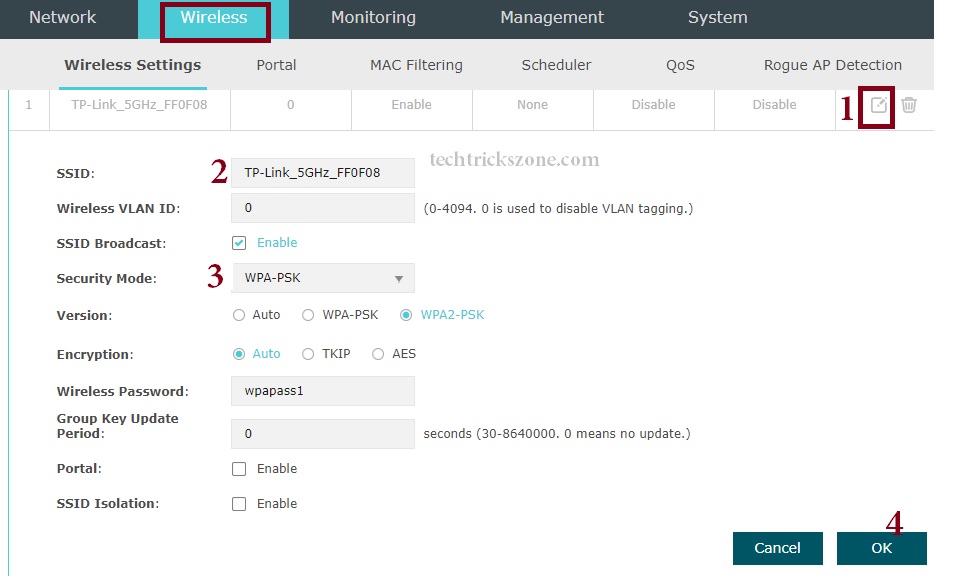
4: Press OK button save settings for 5 GHz in TP-Link EAP225.
After this steps your Wireless configuration done for EAP ceiling mount access Point.
TP-Link EAP225 Dual Band AP Network Configuration
The network contains IP Address configuration to avoid IP conflict issue while using multiple access point without AP controller.
To change default IP go to Network tab.
Use Dynamic if using TP-Link Controller. Use the Static if use AP without the controller.
IP Address: change IP address here.
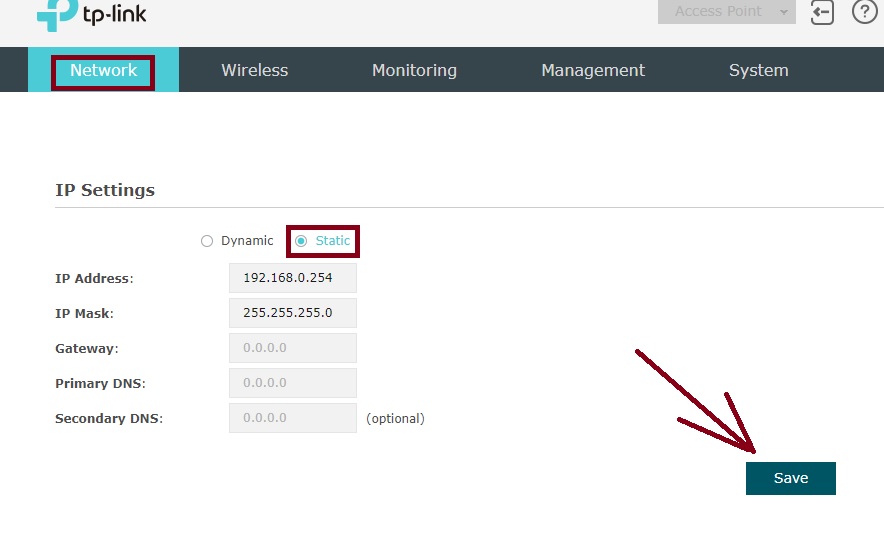
Click Save button to apply settings.
Re-login device with New IP address you have changed.
TP-Link EAP Ceiling Mount AP Management VLAN Setting
Management VLAN required to configure your EAP AP while adding AP in your VLAN network. You need to add your management VLAN ID to TP-Link EAP ceiling mount AP to make it accessible from your Management VLAN.
Go to Management tab from top menu and choose the Management VLAN option
From submenu.
Management VLAN: Enable ( check the box to enable VLAN)
Management VLAN ID: type the Management VLAN ID in the box.
Save the settings and access from management VLAN now.

Management VLAN will make your WiFi network secured access of your wireless access point and restrict from any other network access.
Related Post
- How to set internet Speed limit in iBall AC1200 WiFi Router
- The 15 Best Wireless Range Extenders to Boost WiFi signal [Updated]
- The Best Way to Boost Your Wi-Fi Speed Up to 10x [Tricks]
- How to Choose Best Wi-Fi Router for Your Home
