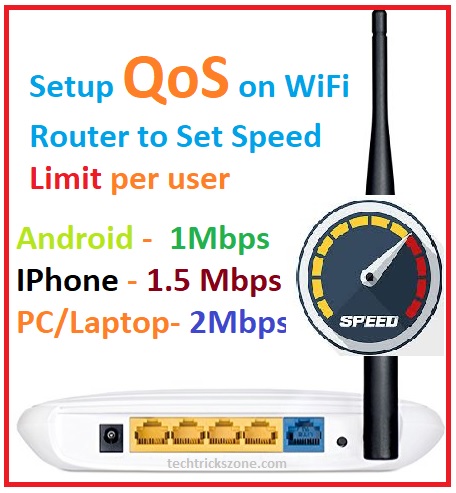
How to setup QoS to set internet Speed limit for WiFi User
QoS full form is “Quality of Service”. This setting is an important feature to manage bandwidth and internet speed. To manage internet speed with every user properly assigning speed limit required. In this post, I will show you How to setup QoS to set an internet Speed limit and increase internet service quality even with a smaller internet plan. Before configuring bandwidth control settings in any router first understand how to use QoS to limit bandwidth to manage and control internet speed on the basic router. Also, know who is using your wifi.
- How to block a Website and Apps on basic WiFi Router
- How to Connect Any Wi-Fi without Password from Mobile?
What is QOS?
The quality of service feature in the basic router gives the option to manage and set the speed limit to every IP address in wifi as well as LAN user. In the router, it manages to prioritize bandwidth for each IP address so important users get the speed and important traffic can pass first. With enabling QOS setting you can set the egress bandwidth management and Ingress Bandwidth limit.
Egress Bandwidth means upload limit of internet and Ingress Bandwidth means Download speed of the internet. For most of the routers, you can get bandwidth control settings with a limit the speed based on prioritizing user and service. But you can get many interesting features with internet access QoS Netgear settings.
How to Setup bandwidth control on TP-Link WiFi router
Here I am using TP-Link WiFi router to manage the bandwidth with priority traffic so follow the simple steps to enable bandwidth control in TPLink Routers.
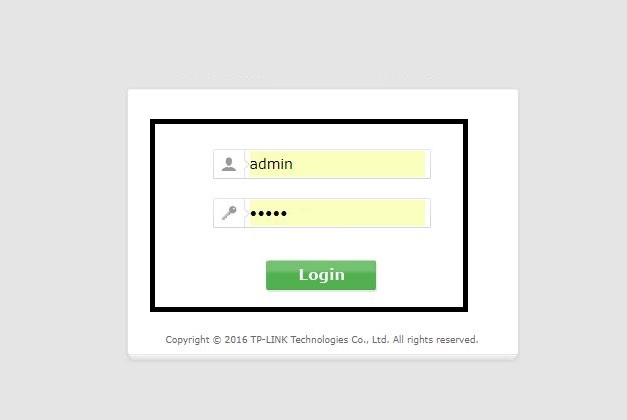
Step1: Login to your WiFi router
Use the Default IP Address or you have changed IP address with the login username password.
See Here TP-Link Default IP address and username password from your model number.
Step2: First Create the IP you want to set BW management for connected wifi and LAN users.
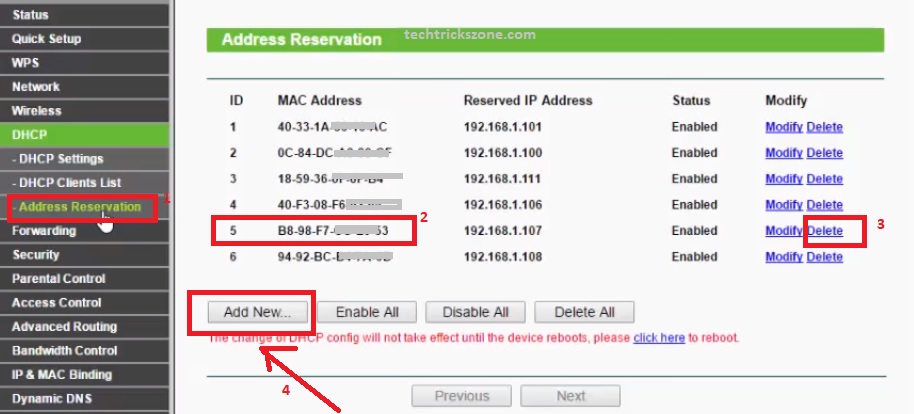
1: Go to the DHCP – Address reservation
Inside the Address reservation option, you can see the connected mobile, PC, and Laptop details.
2: Copy the Mac Address of the user you want to fix internet speed.
3: After the copy, Mac ID deletes the use from the DHCP client list.
4: Click the Add New button
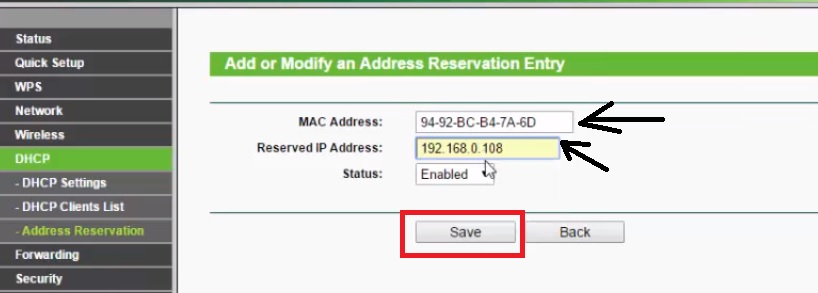
Reserved the IP to the same Mac id you copied in the above steps.
Mac Address: Paste Mac address
Reserved IP Address: give the free IP Address that is not used by any other device.
Click Save button
Step3: How to use Internet Bandwidth Priority traffic Rules setting
Before using bandwidth limiter to set an internet speed limit for each IP address first create the priority Traffic IP address table too.
Just create the IP address distribution list, based on priority internet user to use internet capping on every user to proper bandwidth distribution and management.
1: Management User – 192.168.1.10 to 192.168.20 – 2Mbps
2: Accounts team – 192.168.1.21 to 192.168.1.30 – 1.5Mbps
3: Sales Team – 192.168.1.31 to 192.168.1.40 – 1Mbps
4: Technical Team- 192.168.41 to 192.168.1.50- 2Mbps
This is the proper way to set the speed limit to give the non-priority user limited internet access such as office staff boy who don’t work on the internet. In this way, you can use proper packet shaper in your low bandwidth speed.
Step4: How to Control internet speed with Quality of service
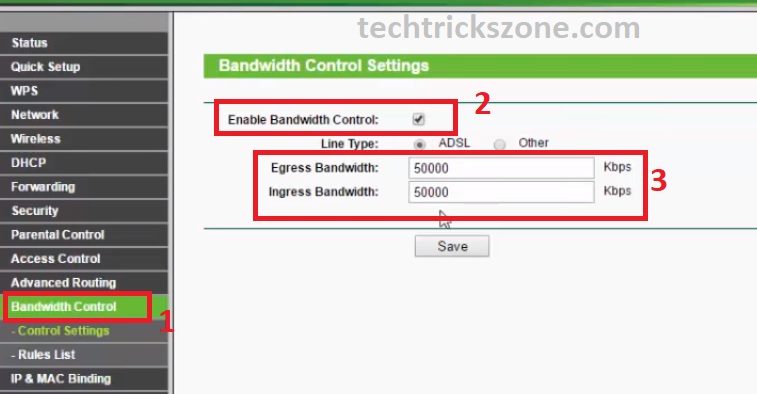
First, enable the bandwidth control settings in the router.
And set the egress speed limit and ingress the speed limit you want to manage with bandwidth limiter.
1: click on Bandwidth control
2: Enable Bandwidth control
3: Set Egress Limit (UPLOAD) and INGRESS LIMIT (Download)
Use the internet plan- if your internet speed limit is 20 Mbps use 20000
Click the Save button to set limit.
Step5: Add the Traffic limit based on Reserved IP Address
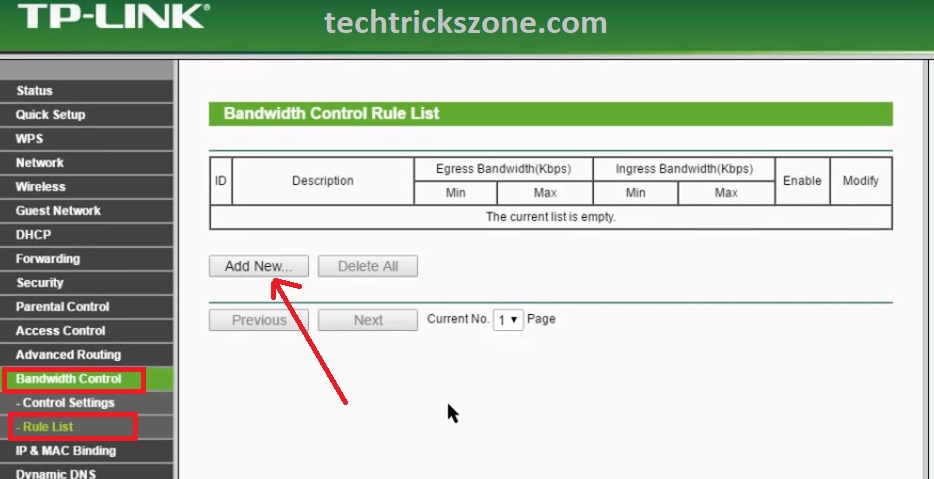
Now to control bandwidth in the home router
Go to the Bandwidth control—Rule List
Press “Add New” Button
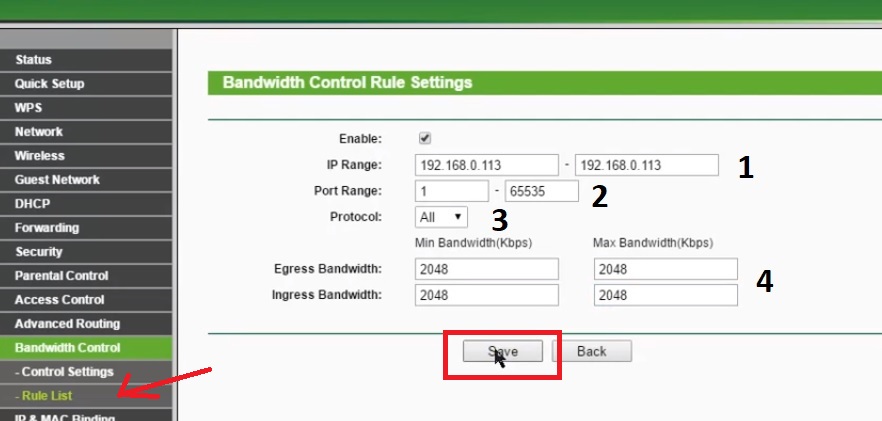
Bandwidth Control Rule Settings
Enable – Check the box
1: IP Range – use the IP range as per the created table above steps.
2: Port Range – use all port (1-65535)
Protocol- choose ALL
Egress Bandwidth – Min and Max (set the internet Download speed you want to give to respective IP series)
Ingress Bandwidth – Min and Max (Set Uploading speed)
Click Save button to create Traffic limit Rules for you bw control management.
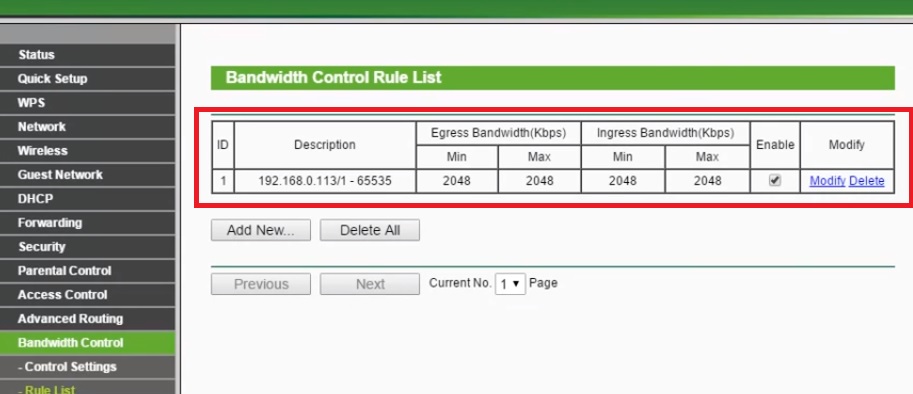
You can see all the rules created in “bandwidth control Rule List” option.
To remove the bandwidth capping on particular IP series just delete the rule from the list.
In this tutorial, you can able to configure the speed limit for Binatone WiFi router and ADSL router Bandwidth control configuration, IBall WiFi router Bandwidth control configuration, Tenda WiFi router QOS configuration.
Download Manual In PDF
Related Post
- 5 things to know when buying Wi-Fi router for home office
- How to increase mobile signal up to 90% in Basement and Home
- How to recover a forgotten Wi-Fi password From PC and Mobile.
QoS Configuration Video Tutorials for TP-Link WR741 WiFi router.

