EPON OLT (Optical Line Terminal) Configuration and EMS Installation Step By Step
OLT stands for Optical line termination used in the fiber network. EMS s remote management system for OLT, ONU monitoring, and managing from remote. Today network switch to fiber from the Cat6 cable network. As the fiber data flow capacity is multiple than cat6 cable capacity and distance also increase 20 times more than normal cat6 and cat5 cable.OLT and ONU both are the product used in the fiber network to increase the speed and distance capacity delivery to the client end. This post describes you how to install EMS and manage OLT and ONU installed at the client end from a single point. To start EMS installation and testing EMS with OLT and ONU you should have complete product and accessories with you. see the complete guide for Fiber OLT EMS software installation and setup for different brand ONT devices. To protect network devices from lighting is important during the rainy season.
EPON OLT configuration and ONU configuration from EMS required accessories
-
EPON OLT
-
ONU/ONT
-
PON Module (as supported your OLT)
-
Fiber patch cord is supported by PON module
EMS (Equipment Management System) installation in Windows
Before installation of EMS software required some supported support for database management as given below. Mysql server will install and configured first to manage user and database management.
-
MySQL server
-
EMS software
1:- Mysql server- Open the CD comes with your EPON OLT and run the first MySQL server. see the installation process given below.
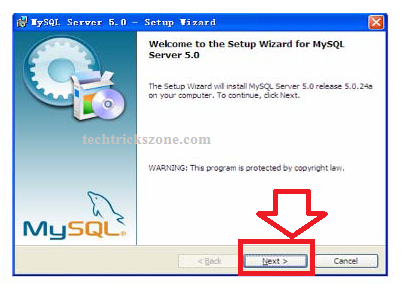
RUN mysql.exe file and press the Next button to proceed installation.
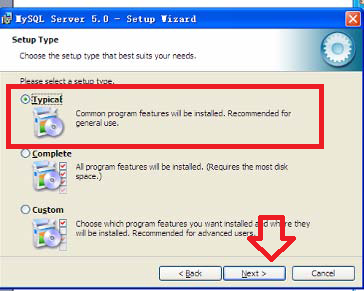
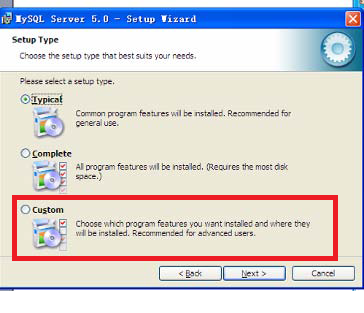
In this step choose Typically and click Next button for further steps.
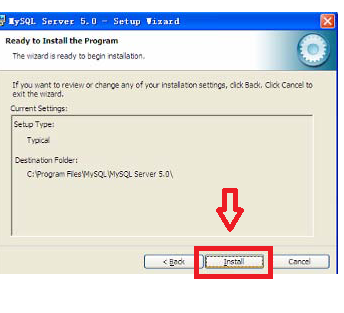
Click Install button to next step
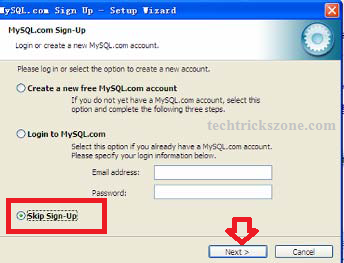
Check Skip Sign-UP and click next because we do not require MySQL login here.
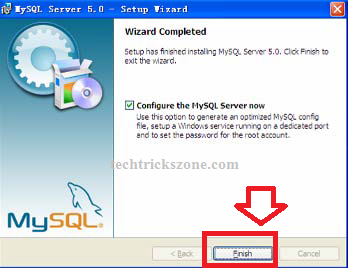
Wizard Completed –
Configure the MYSQL Server now- select this option and click finish. After finishing the MySQL server configuration wizard will start.
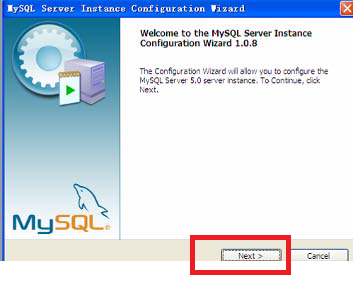
MySQL Server Configuration
The first step just clicks next to the further configuration option.
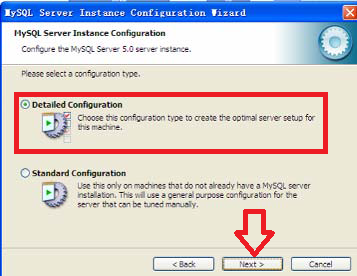
Choose the Detailed Configuration option and press the next button as shown below image.
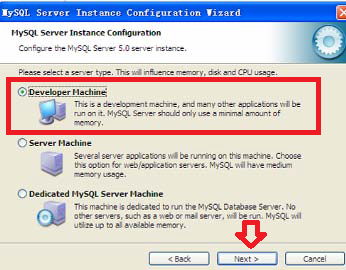
Select the Developer Machine option and press the Next button.
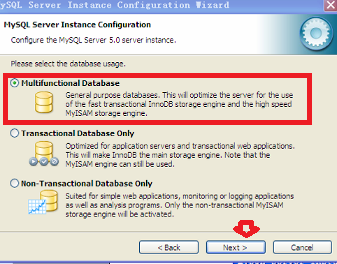
Choose the Multifunctional Database option and press Next button
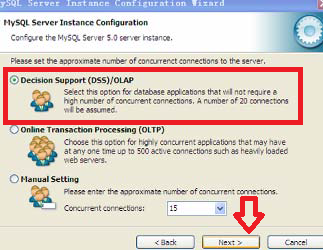
“Decision Support (DSS)/OLAP” – choose an option and click next
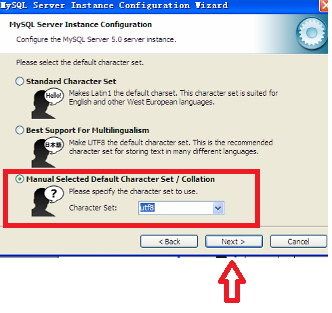
Choose “Manual Selected Default Character Set/Collation” option, and specify “Character Set” as “utf8” click Next button
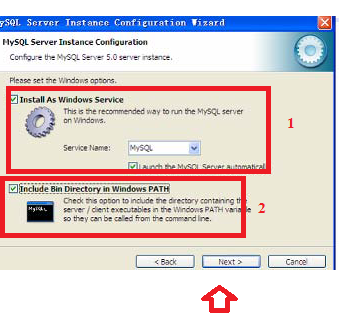
Choose “Install As Windows Service” option and the “Include Bin Directory in Windows PATH” option, click Next:
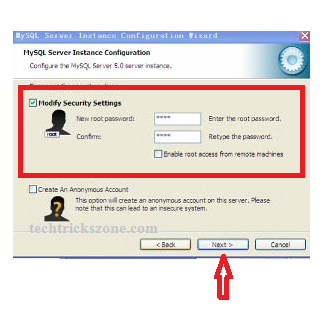
Modify Security Setting – in this option you have to set the password for login EMS software.
Set New Root Password- type password here (This password will use to login EMS software to access the database server)
Confirm password– retype the password to confirm.
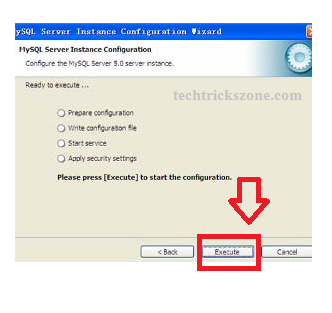
Press the Execute button.
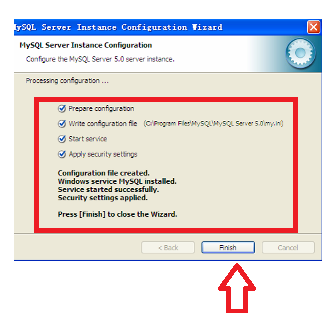
If all options executed successfully then you can finish the wizard to go EMS software installation.
IF you are getting Error on the start service
“Cannot Create Windows Service for MySQL. Error:0”
Please Uninstall the Mysql server and do the modification on the second steps where we choose the below option.
Instead of using Typical choose the Custom option and change the MySQL5.0 to Mysql 5.5 on the last of the path.
Now follow the same steps shown above.
EMS Software installation and configuration
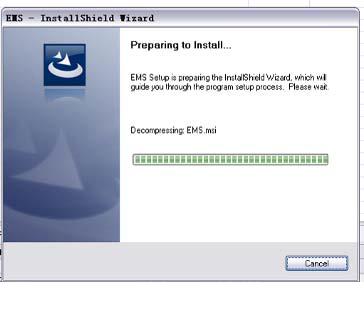
After the successful installation of MySQL server now start EMS software comes with CDs inside OLT. Run the setup wizard of EMS “EMS_V2.3.7_160315_I116.exe”
EMS software installation wizard will take 10-30 seconds to finish. Its depend on computer configuration and speed.
Start the EMS server.
Run the EMS server first if you are running an EMS server and client in the same PC. See the EMS server icon in the desktop or program menu to start the EMS server.
See this icon to start the EMS server.
Login EMS Software Now
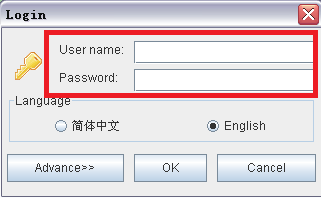
To login EMS software click the EMS client icon from the desktop you will get login windows to access EMS software and database
EMS software login from the remote computer
Username- admin
Password- you have set during MySQL server configuration.
Click OK to login
EMS Software login from the remote computer.
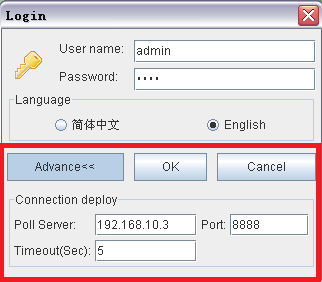
If you are using EMS client login from another computer then you have to set poll server IP address to the advanced option as given below
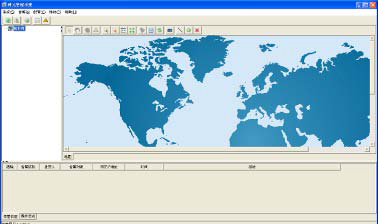
Once EMS software login successfully you will get startup windows with world map view.
Now you have to add GEPON OLT to start the configuration and detection ONU devices from the network.
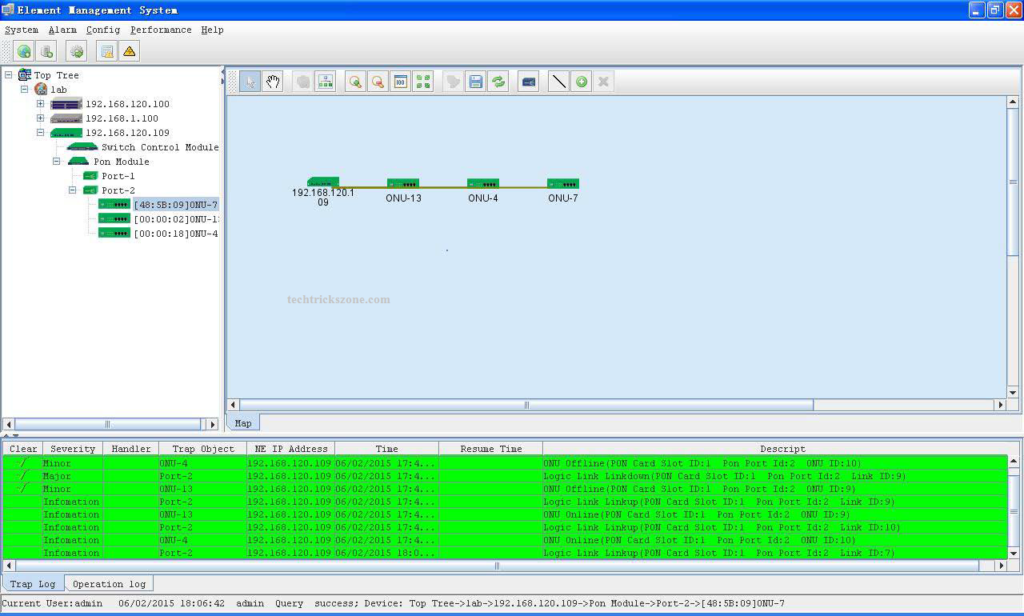
EMS Software Network diagram
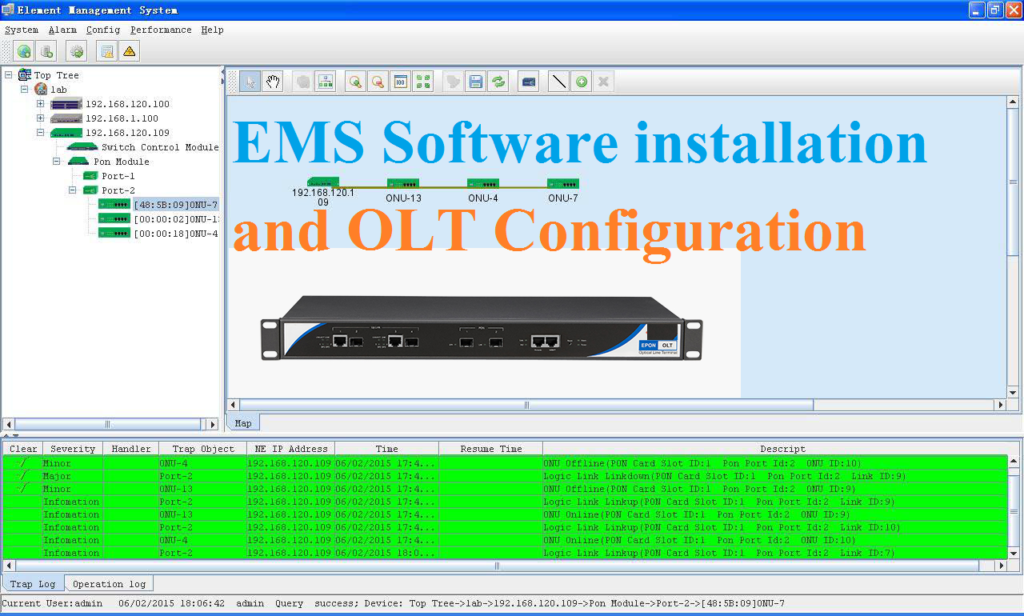
You can add multiple OLT devices to single EMS software and ONU device will auto-detected from OLT and start adding a network map diagram as shown given MAP.
How to add OLT device and configuration of ONU device in EMS software see the video tutorial given below.
I hope this user manual helps you to set up your fiber network with Fiber OLT EMS software installation and monitoring from the remote site. if you get any type of error during the OLT EMS software installation and setup please comment or email with the Contact Us page.
Buy SyroTech GPON OLT 50% instant discount Now
Related Post
- Best GPON and EPON OLT (Optical Line terminal) for Fiber Network
- How to block any Website and Apps on basic WiFi Router
- What is OLT, GPON, ONU in Optical Fiber Network

