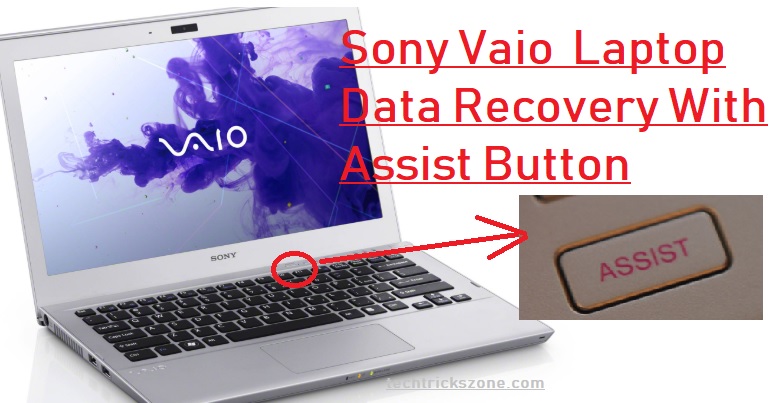
Sony Vaio Latitude Data recovery with Assist Button using the recovery image
Earlier I posted about “how to data recovery from phone and PC” but this post for those who own the Sony Vaio series Laptop. If you are unable to open your Sony Vaio latitude E series laptop windows and it is frequently restarting. If you are worried about your saved picture, video, and other data, then you may not be aware Sony Vaio laptop comes with an Assist button to recover your data when Windows is corrupted. here you are going to learn in just 8 steps Sony Vaio Latitude Data recovery with Assist Button.
This post will assist you with an inbuilt feature of the Assist button “How to Recover Data from Sony VAIO Laptop without using any recovery software”. All laptops and Desktops which come with original Windows pre-loaded have a recovery image created on them. Use of recovery image when your Laptop or Desktop windows are corrupted due to any reason. You can recover your saved data by recovering your windows again until you do not delete the recovery partition from the drive.
This post supports all Windows like Sony Vaio Windows 7 recovery with the recovery image, Windows 8, and Windows 10 also. So just see the power of the Assist button on the Sony Vaio laptop to recover your deleted photos and videos with restoring your operating system to factory mode.
Sony Vaio E Series Assist button Data rescue Process.
To recover your windows and rescue your lost data from a Sony Vaio laptop connect the laptop to the power charger and follow the steps below. You can also use the System recovery disk to recover your windows if no assist button on your laptop. Here I am using the Sony Vaio Latitude E6410 Laptop Assist button for Data recovery steps.
Step 1:- Press the Assist button and wait on the laptop and start the recovery process.

Wait to finish this process and enter to next steps.

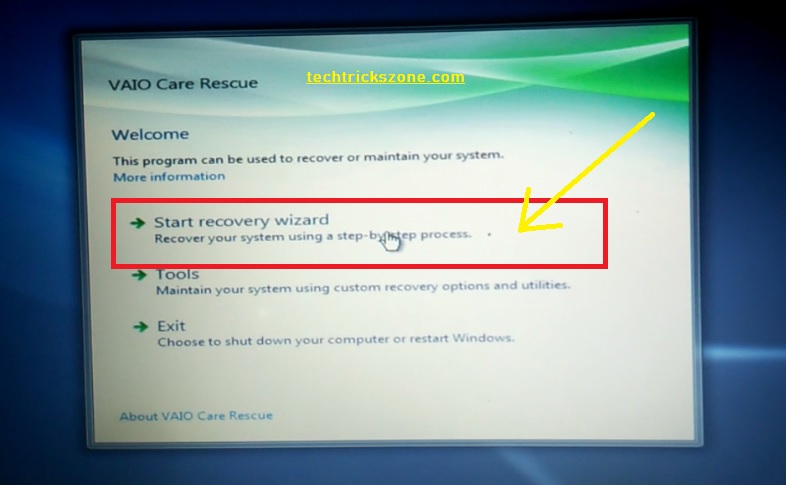
Step 2: in VAIO care Rescue you will get many options.
- Start recovery Wizard
- Tools
Click Start Recovery Wizard to rescue your deleted data from your Sony laptop.
Step 3: Yes I’d like to start to rescue now
Choose “Yes I’d like to start rescue now” to start recovery

Step 4: Choose the rescue type
- Easy Rescue – in this option all data will save to an external storage device.
- Custom rescue– in this option you have to select the file you want to recover from the hard disk.

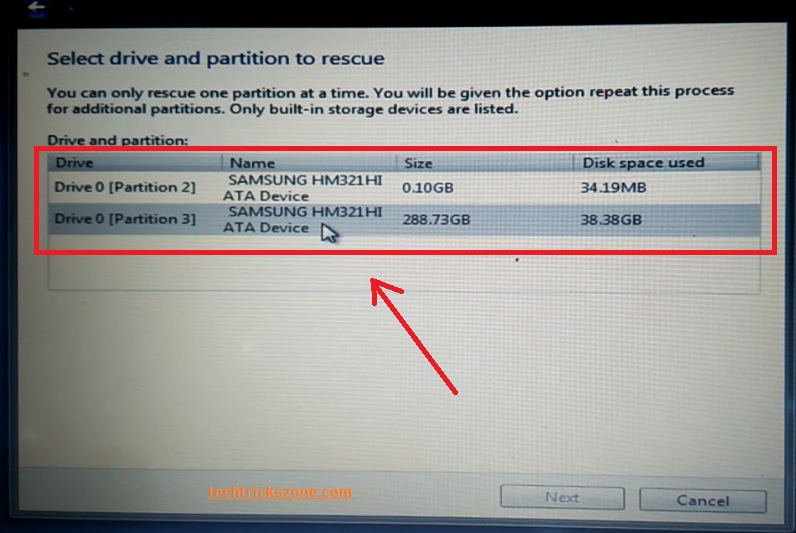
Step 5: Select the drive you want to recover data from
In these steps, you will get all the partitions on your hard disk. Choose the partition you want to rescue data from.
Select Drive partition and click the Next button at the bottom
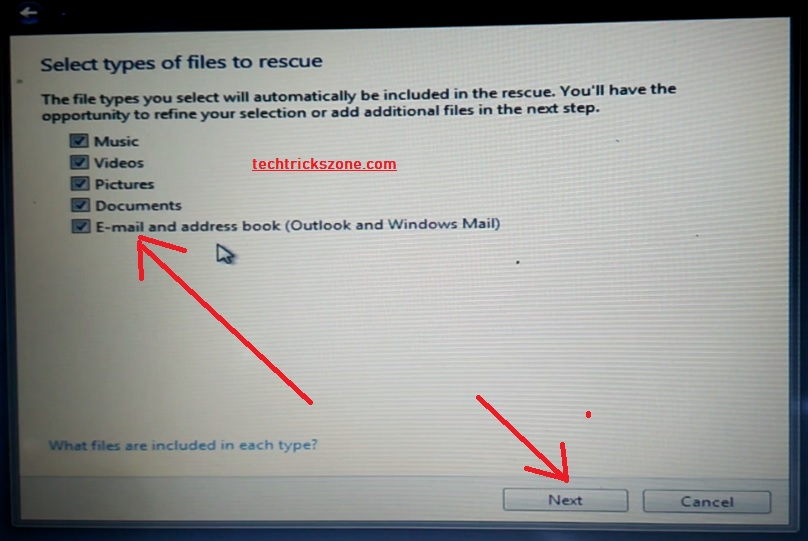
Step 6: Select the File type you want to recover, like Document, picture, video, email..etc
Select all to recover all types of data and press the next button.
Wait for 2-3 minutes to analyze and get all the data information from the hard drive.
Detecting data takes time depending on the data size in the hard drive.

Step 7: Select the data folder from the hard disk to recover the data
You can select all folders and can choose only important folders like my document, music, photos, etc.
Click the Next button after finishing the selection.

Step 8:- Select the external drive you want to save all the recovered data.
Please connect the external drive according to the size of the data you want to recover from the Sony Vaio laptop.

After selecting an external hard disk or pen drive press the Next button.
To recuse your data can take up to 5-10 minutes depending on the size of your recovery data.
So be patient to recover the process finish from the Sony laptop recovery with the recovery image.
This is the Data recovery from Sony Vaio Latitude series laptop with a recovery partition created inside the hard drive. Recover steps also can be done with an external recovery DVD Disk.
Related Post
- 10 way to Speed up Your Slow Windows 10 Laptop and PC
- The 10 Best Data Recovery Software for Windows, Android and Mac PC.
- Top 10 Best Download Manager for Android,Windows,Mac,Linux and I Phones
Buy Sony Laptop Now up to 30% instant discount with EMI
