
How to Upgrade OpenWRT firmware to DDWRT firmware
OpenWRT and DDWRT a custom open-source firmware for Wifi router to increase router performance. Open Source alternative firmware can use to get the extra features in router stock firmware and improve router stability as well as wifi performance. OpenWRT and DDWRT both are free alternate firmware for WiFi router and available with brand original model compatibility. Upgrading TP-link WR743Nd firmware to OpenWRT firmware and OpenWRT firmware to DDWRT firmware upgrade using simple steps.
If you have upgrade OpenWRT firmware to your router original firmware replacement or want to replace OpenWRT firmware with DDWRt firmware then follow steps carefully. Before upgrading firmware make sure your router model supported firmware available in DDWRT database. While upgrade WiFi router firmware to OpenWRT or DDWRT always use the physical connection from router LAN port to avoid router damage.
Upgrade OpenWRT to DDWRT firmware
To upgrade OpenWRT firmware you need to download compatible firmware from the DDWRT firmware database. Check the router model number in the router sticker or if the sticker damages the login router using an IP Address to check the installed firmware version and router models.
OpenWRT Default IP 192.168.1.1
Username – root password- NA (no password on default)
Connect Router LAN port and Open a web browser to access OpenWRT IP Address.
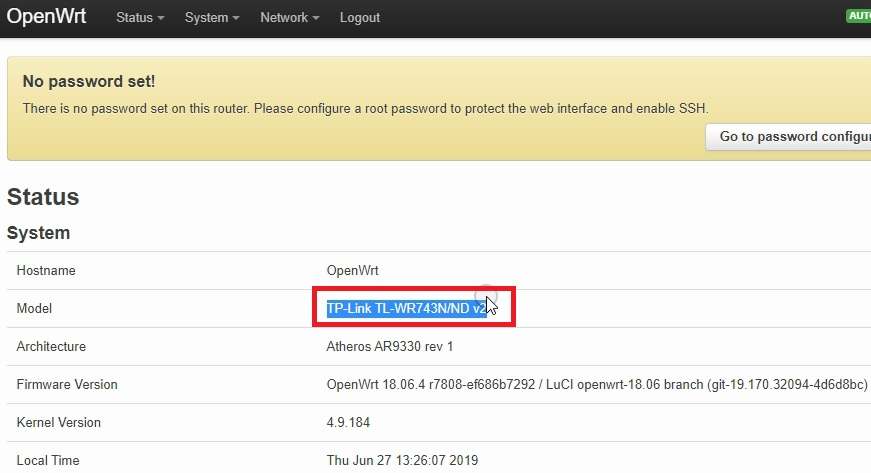
The router status page will show all the information about the software version and hardware version.
Find the model number showing on the status page as shown below image.
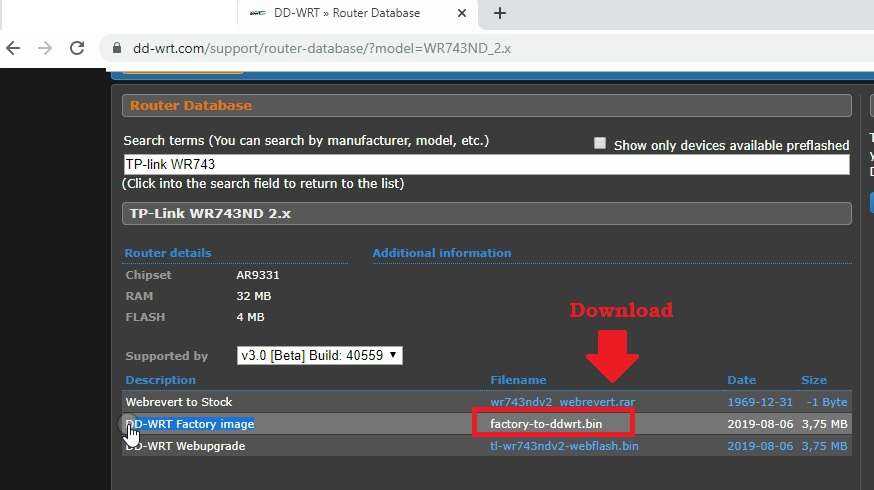
Go to DDWRT firmware database and search for the model number.
Download DD-WRT Factory image firmware file “ factory-to-ddwrt.bin” file
To revert back DDWRT to Orignal firmware download webrevert to stock firmware file from the dd-wrt database.
Download the file and save it on the desktop.
Upgrade DDWRT firmware
Once DDwrt firmware downloaded now upgrade firmware.
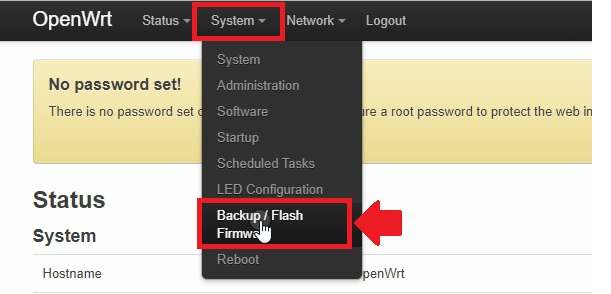
Go to System- Back up/Flash firmware from the top menu in OpenWRT firmware.
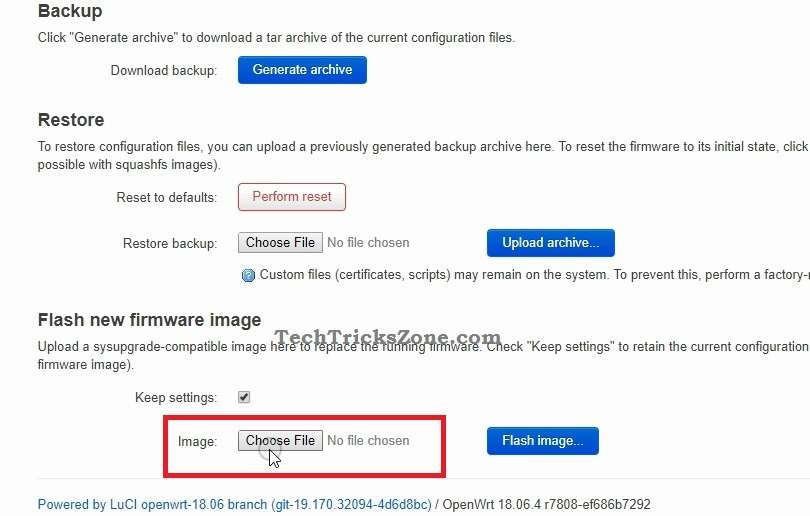
Backup configuration: before upgrading firmware save configuration settings or backup so you can revert any time with OpenWRT firmware and restore configuration file from backup.
To Backup configuration file press the Generate archive button.
Flash new firmware image:
Press choose file button to browse dd-wrt firmware downloaded from the DD-WRT site.
Browse firmware file saved in the drive and select the firmware file.
Press the open button to upload firmware to the router.
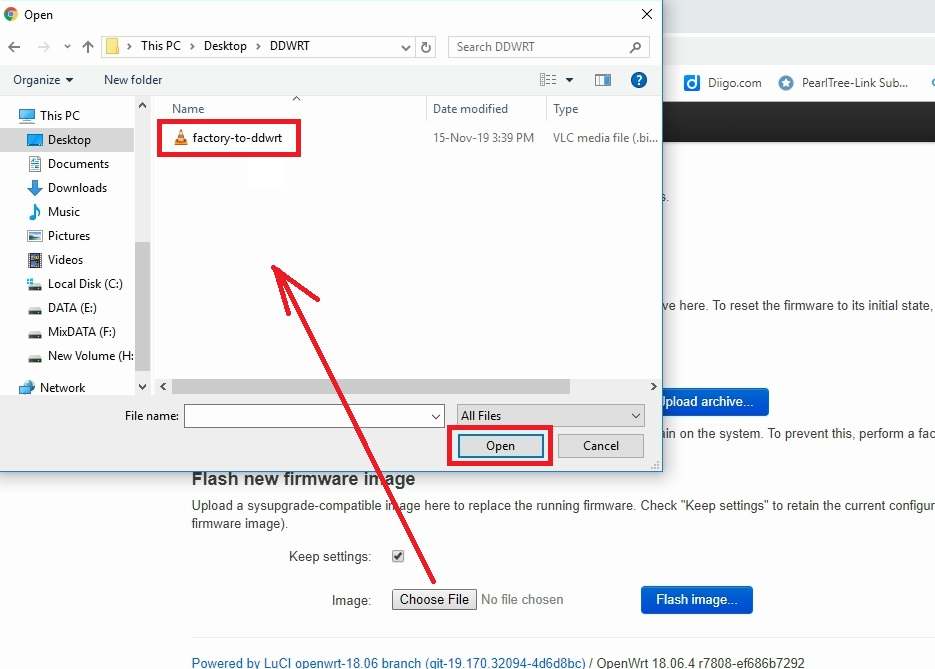
Once the file selected to confirm the file name choose the correct firmware copy to avoid upgrading the wrong firmware to wifi router which can damage the router permanently.
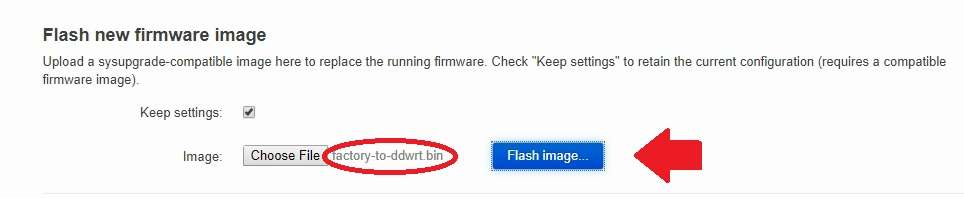
Once the firmware file confirmed the press Flash image button to upload the file to OpenWRT flash.
Flash firmware- verify
The router will verify checksum and MD5 value to confirm firmware supported or not.
Press the proceed to button to confirm firmware upgrade and switch OpenWRT firmware to DDwrt firmware.

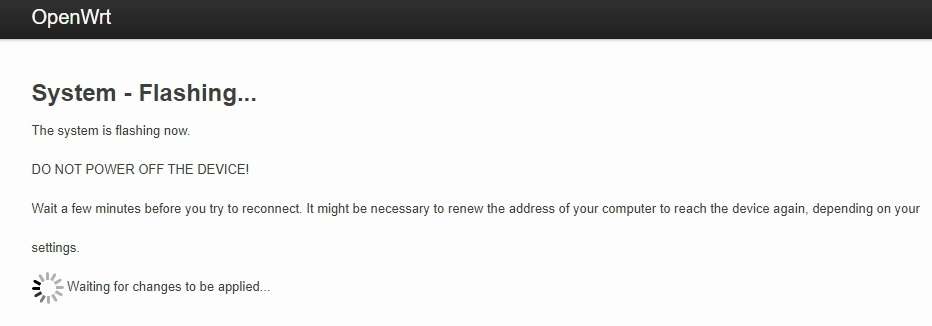
System – Flashing
To flash OpenWRT firmware to DDWRT firmware will take 2-3 minutes and the router will reboot once firmware upgraded successfully.
Wait to finish the upgrade process and ping default IP 192.168.1.1 to confirm the router firmware process finish.
Note: Do not disturb LAN cable or power while the firmware flashing process going on. Making any interruption during firmware upgrade can brick router permanently.
Once the router upgraded to DDwrt firmware than you can access 192.168.l.l IP address.
DDwrt firmware access first time needs to set up a login username and password to prevent unauthorized access.
Create the login username password first time for DDWRT firmware and configure other settings.
Related Post
- How to block User in TP-Link WiFi Router
- How to Add Multiple SSID in Single Access Point [Multiple WiFi Name]
- Best WiFi Routers for Gaming in Tri-Band [5GHz+5GHz+2.4GHz]
- How to use WiFi Router as WLAN Adapter for Xbox and NVR
