MikroTik RB3011 UiAS-RM Router Setup and Configuration first Time
MikroTik RB3011 UiAS-RM Multi-Ethernet Router first time is similar to other Mikrotik Router devices. This router is rack mountable with 10 Ethernet ports and 1 USB port. RB3011 has an LED touch screen to check settings without logging Mikrotik router using touch functions. This MikroTik configuration user guide also can be used for setup Mikrotik rb951ui-2hnd, Mikrotik rb750gr3, and other RB series models.
Follow step-by-step first-time setup and configuration of Mikrotik RB3011 UAiAS-RM router board with bridging all the Ethernet port work as a network switch.
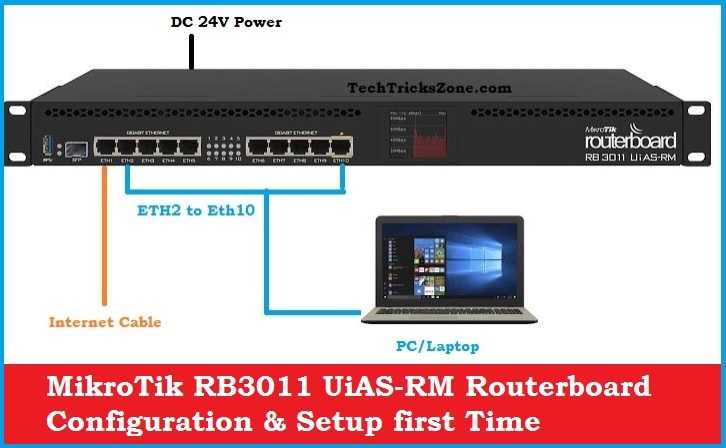
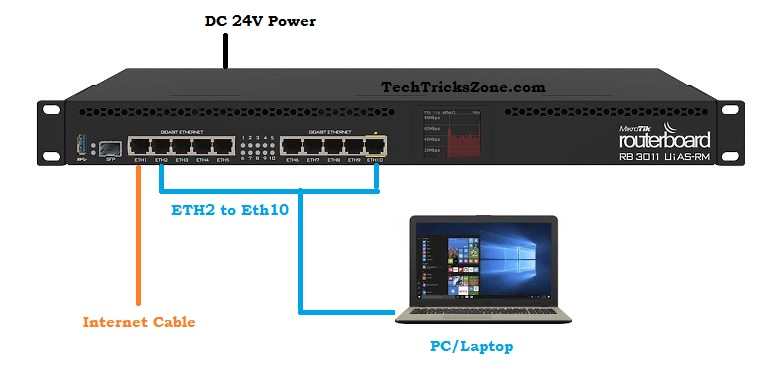
RB3011 Router board Physical connection
Ethernet 1 is a WAN port and 2-10 Gigabit LAN Ethernet port in RB3011 UiAS-RM Router.
Connect Ethernet 1 to Internet Cable coming from Internet providers. Connect the Laptop/Desktop LAN port to any from Ethernet 2 to Ethernet 10.
Power on Router 24V DC power adapter comes with the device.
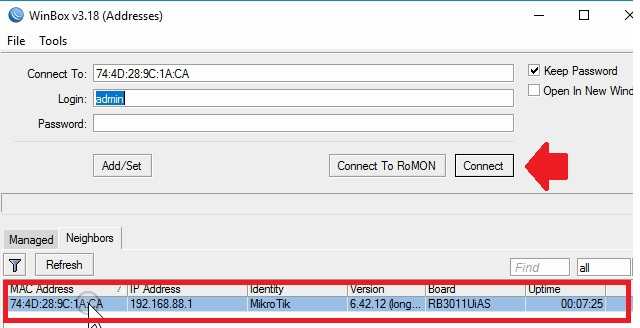
Login MikroTik Router board RB3011 from Winbox
After connection, open the Winbox configuration utility.
Download WInbox Now.
Open Winbox tools click on the Neighbors tab and refresh.
Select the router and click the Connect button.
Configuration Step for MikroTik RB3011 UiAS-RM
1: Bridge All port
2: LAN IP Configuration
3: WAN IP Configuration
4: DHCP Configuration
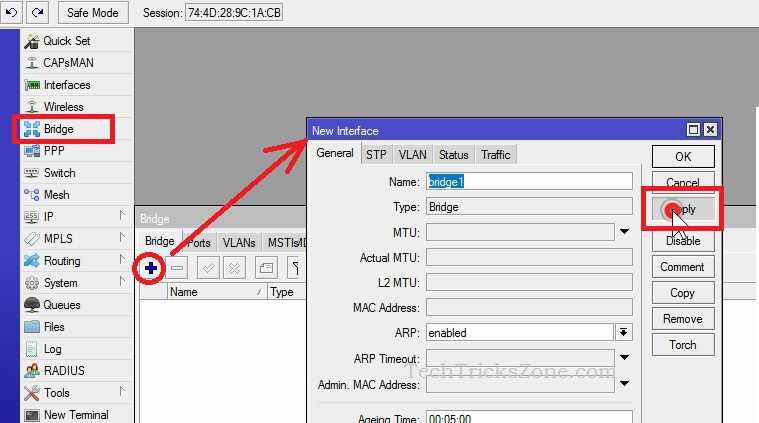
1: Add Bridge and Join all Port to Bridge
By default, all port of RB3011 is bridged but if you remove the default configuration during the first login then need to add a bridge so all LAN port can bridge together.
Go to Bridge from Left side menu.
Bridge: click the Plus (+) button to add a new bridge.
Name- Bridge1 ( you can give any name to bridge as per your choice)
Click Apply and OK button.
After Add bridge now adds all Ethernet port to bridge together.
1: Go to Port tab
2: Press Plus (+) button to create New Bridge Port.
3: Interface: Ether2 (select the all port one by one from Eth2 to ETH10).
Bridge: Select the bridge name if you have created multiple bridges. Keep default selection if only one bridge added.
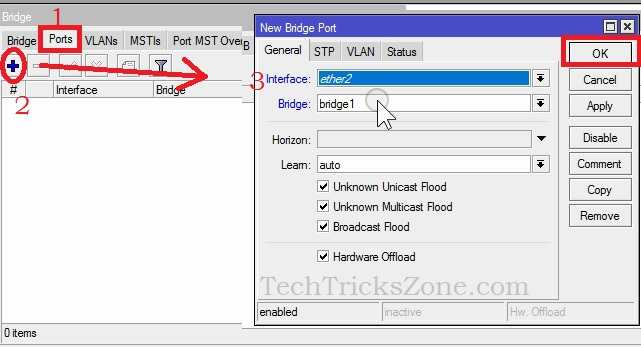
Press Apply and OK button to confirm settings.
2: LAN IP Configuration
LAN IP Configuration must be changed before using the Router board in the live network.
MikroTik RB3011 Router board default IP is 192.168.88.1 and this IP default for every MikroTik device. So change the different series IP Address in LAN so IP conflict issues can prevent.
Go IP-Address from the Left side menu.
Press Plus (+) button to add the IP Address.
Address- 192.168.2.1/24 (change the default IP Address)
Interface- Choose Ethernet from LAN or can also use the Bridge interface.
Click Apply and OK button.

After Changing IP address if your RB3011 Login via IP address it will disconnect so re-login with new ip address.
RB3011 UiAS-RM WAN IP Configuration
Next configuration is WAN settings. Keep ready your internet WAN settings to configure Mikrotik router. These settings are also similar for Mikrotik rb2011 and any other MikroTik routerboard with multiple LAN ports.
If you don’t know WAN settings detail contact your internet providers to get details.
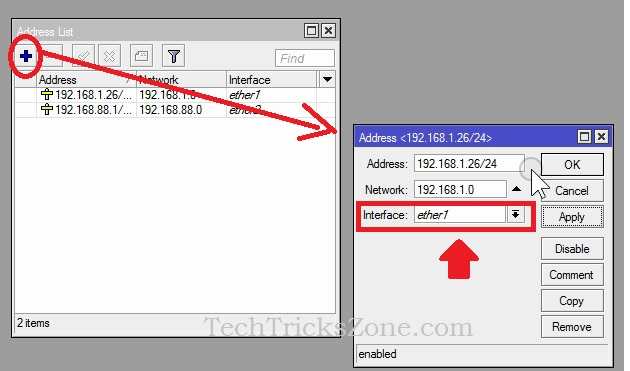
Go to IP-Address
Click Plus button to add New IP Address.
Address: type WAN IP Address in this post with /24 in last as showing below image.
Network: Click the Apply button after giving IP Address to get Network information in this box.
Interface: Ether1 ( in RB3011 Ether1 is WAN port)
Click Apply and OK button to confirm settings.
Add Default Gateway in Mikrotik RB3011
Gateway is the part of WAN configuration so without adding gateway detail internet will not work.
You can add a gateway from two methods.
Add gateway from GUI settings and Also can add gateway using the terminal.
To add gateway using settings.
Go to IP- Routes option
Press Plus button and give gateway IP detail in the gateway option.
Add Default gateway in Mikrotik from Commands
Adding gateway using terminal command is bit simple.
Open terminal from left side vertical menu.
Run the command “ip router add gateway=192.168.1.1” (give your gateway IP and hit enter).

Close the terminal and proceed for next steps.
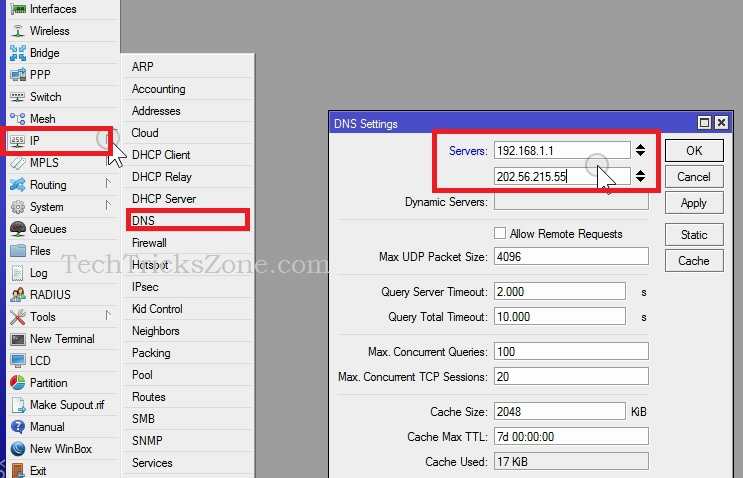
Add DNS in Mikrotik RB3011
DNS also part of WAN configuration so adding DNS information important to avoid any internet problem.
Go to IP – DNS settings
Server: 4.2.2.2 (click down arrow to add more DNS box to add alternative DNS)
Click Apply & OK to save settings.
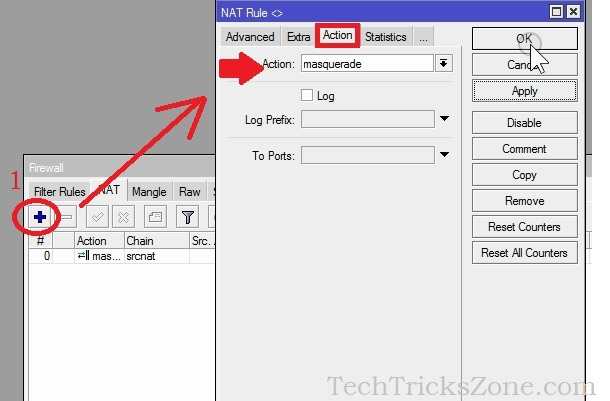
Enable NAT in Mikrotik RB2011/RB3011 Routerbaord
NAT is important to work the internet on any router. So NAT must be enabled in MikroTik router.
Go to IP- Firewall settings
1: Click the NAT tab and press (+) Plus button to create NAT rule.
Go to the Action tab.
Action: Select “masquerade” from the list.
Click Apply and OK button to save settings.
After finish WAN configuration internet should start working.
MikroTik RB3011 / RB2011 DHCP server Setup
To providing auto IP configuration to every node connected to the network DHCP server should be enabled.
Create a DHCP server using simple steps.
Go to IP – DHCP Server settings.
DHCP: Click DHCP setup button as shown below image.
DHCP Server Interface: Bridge1 ( choose the bridge name if you have changed default bridge name)
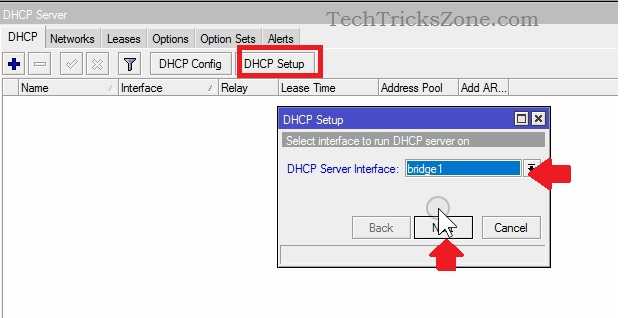
Click the Next button.
Select Network for DHCP Addresses
DHCP Address Space: 192.168.88.0/24. (by default selected keep it want to use the same network)
Click the Next button.
Gateway for DHCP Network: Gateway selected auto.
Click the Next button.
Select Pool of IP Address given out by DHCP server.
Address to give out: 192.168.88.2-192.168.88.10 (type start and End IP Address you want to use in DHCP).
Click Next button
DNS server: Auto selected just click Next button.
Lease time: 00:10:00 by default – you can increase lease time.
Click Next
The setup has completed successfully.
Now your RB3011 Router ready to work in the live network.
This is the simple configuration of Router board for First time unboxing and setup. This user manual support configuration for all Mikrotik RB series routers.
Related Post
- How to Reset MikroTik CCR Router from Reset Button
- Mikrotik RouterOS and Firmware Upgrade Using Winbox [Online/Offline]
- 192.168.0.1/192.168.1.1 Tenda Login
- Frontier Router Login IP Address 192.168.254.254
Download MikroTik RB3011 Manual in Pdf
