The simple setup guide for UBNT Lite Beam Point-to-Point Configuration for long-distance wireless connectivity.
UBNT Lite Beam Point to Point Configuration
In an earlier post, we published several UBNT configuration manuals such as airFiber 5X configuration.UBNT lite beam is a lightweight 5 GHz Wireless CPE with many ranges. It is the best UBNT client device available with up to 450+ Mbps throughput. UBNT lite beam comes with 4 different mode LBE-M5-23, LBE-5AC-23, LBE-5AC-Gen2, and LBE-5AC-LR. All model comes with different Antenna gain from 23 dBi to 26 dBi with the price difference. In this post, you will get step-by-step point-to-point configuration for ubnt Lite beam 5AC. Lite beam device support Access Point, Client WDS in bridge mode and Router mode as well.
The Configuration of Lite beam point to point bit simple with airOS 8. The latest lite beam model is loaded with airOS8 which comes with many advanced features and parameters. Also, know the configuration of UBNT AC controller. Before installing the Lite beam in the Site make sure you have done Site Survey to check Feasibility of Wireless Connectivity.
To setup Lite beam device in point-to-point mode needs two devices. You can also set up a Lite beam as Client mode with any UBNT device. To configure the UBNT lite beam CPE device both devices with a Laptop to access the web interface. You can also download UBNT management smartphone apps to manage your device.
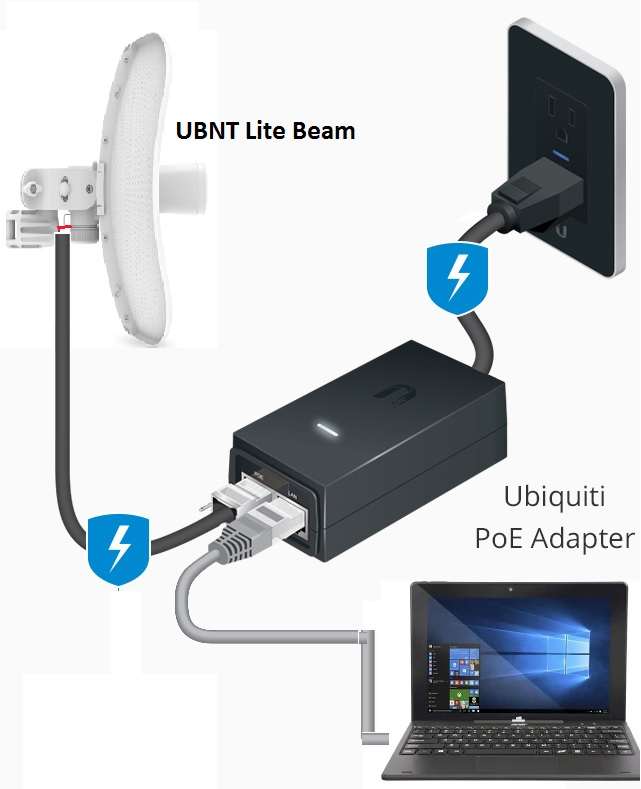
UBNT Lite Beam Connection Diagram
The UBNT lite beam comes with different parts in the box. So before mounting need to assemble the parts. However, the configuration required only the device part.
Now Connect the physical wire connection from PC/Laptop to the lite beam.
- Connect Lite beam LAN port to UBNT PoE Adapter PoE port.
- Connect the PoE Adapter LAN port to the PC/Laptop LAN port.
Configure Laptop LAN port to UBNT Default IP Series.
UBNT Lite beam Default IP Address- 192.168.1.20
Default username: ubnt
Default Password: ubnt
Use 192.168.1.10 to Laptop or Desktop LAN port to access the Lite beam web interface.
UBNT Lite Beam 5AC Login First Time
If you have used any Ubiquiti wireless device before then the configuration of Lite beam is simpler for you. The first-time login of the Ubiquiti network device needs to set the country and language with accepting terms and conditions as per UBNT policy.
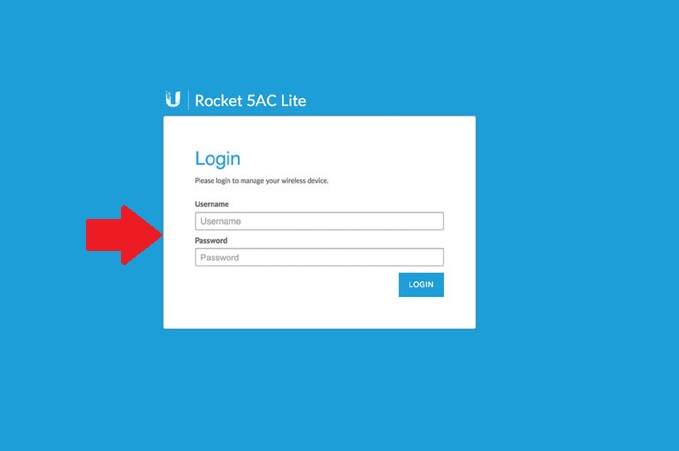
Open a Web browser and type http://192.168.1.20.
![]()
Use “ubnt” in the username and password for the first-time login.
Press the Login button.
“Accept UBNT terms and conditions”
Username: ubnt
Password: ubnt
Country: choose your country to follow the guidelines.
Language: Select the language you want to use in your Lite Beam web interface.
Check the box “I agree to these TERMS of User and UBIQUITI FIRMWARE LICENSE AGREEMENT”.
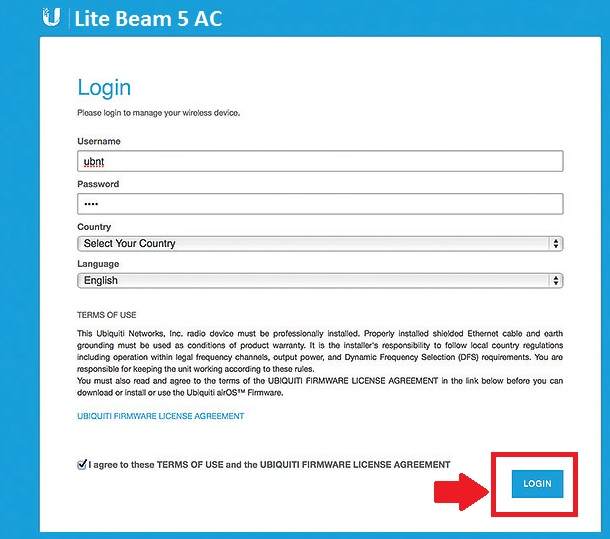
Click the “Login” button
UBNT Point to Point Configuration Step by Step
Configuring PTP in lite beam required two devices with different Wireless mode setups.
Device 1: Setup Lite Beam as Wireless Access Point mode
Device 2: Setup Lite Beam as Client (Station WDS) Mode
Now follow the steps one by one device configuration of point-to-point mode for long-distance wireless connectivity.
UBNT Wireless Access Point Mode Configuration
Now follow the steps to setup ubnt in Access Point WDS mode.
Go to the Wireless Tab in the airOS 8 firmware version to configure Wireless settings.
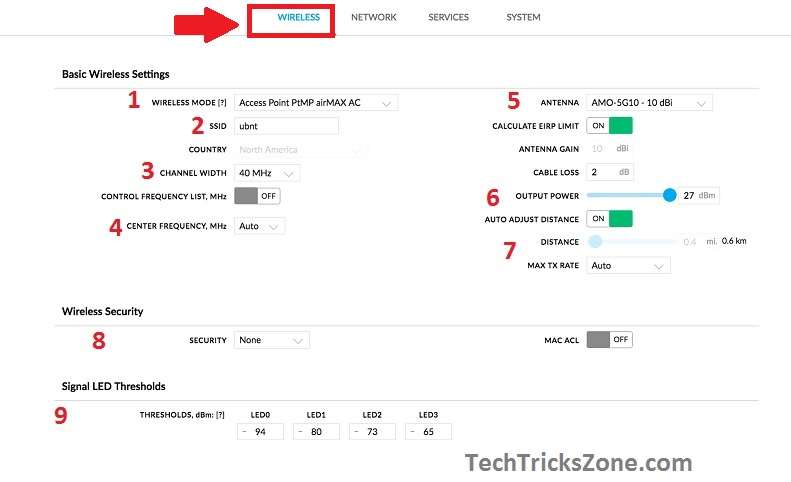
1: Wireless Mode– Access Point PtMP airMAX AC
2: SSID- UBNT (change this for new Link name)
3: Channel Width– use 40 MHz if required more throughput (if using a lite beam in a highly interference area choose the 20MHz to avoid any issues due to interference)
4: Center Frequency MHz– select the frequency as per your telecom regulation and work perfectly in the location.
5: Antenna– select the Antenna gain of the device as per supported by your lite beam device.
6: Output Power– select TX power as per distance. If looking short distance connectivity then reduce the power.
7: Distance– provide the air distance as measured by GPS during the site survey.
8: Wireless Security- choose the security Type (WPA2-PSK)
Wireless password- set the password for Lite Beam which needs to be provided while connecting from Lite beam CPE device.
9: Signal LED Threshold– Set the signal range you wish to use an LED light showing in a Lite beam device. This setting will help you to align the antenna.
You add an Extra Security Feature to enable MAC ACL (Mac Access List) to only allow connecting CPE device Mac Address added in AP device.
Click the Save and Apply setting to make changes.
UBNT Wireless Device LAN IP Change
Once you have configured AP WDS device mode connect the second device to configure as CPE.
The first step of configuration changes the IP Address of the UBNT device as both the device running in Default IP Address.
Change the CPE device IP Address to avoid network conflict.
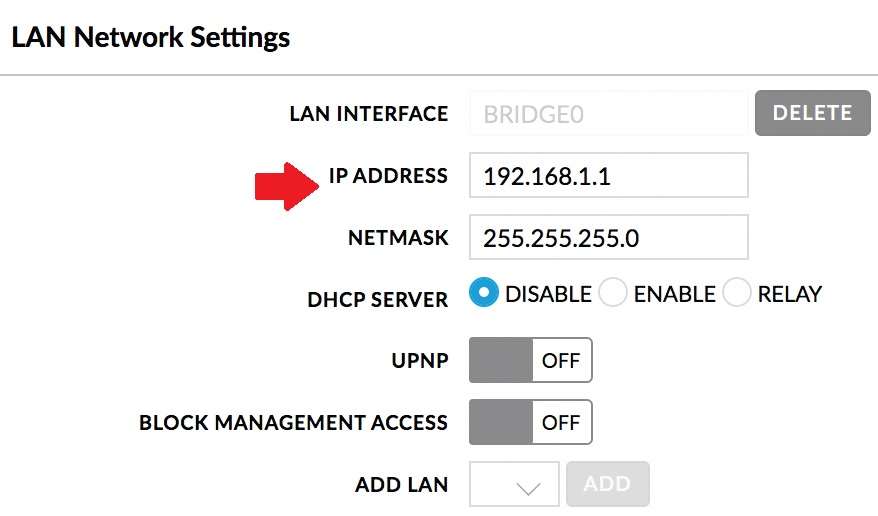
Go to the Network tab from top menu.
LAN Network Settings:
IP Address: Change the IP Address in this box.
Press the Apply setting button and access the device again with the changed IP Address.
Once you have change LAN settings in Lite beam CPE device now proceed to configure as client mode.
UBNT Wireless Device Setup in Station WDS Mode
Now set up the lite beam CPE device in Station WDS mode.
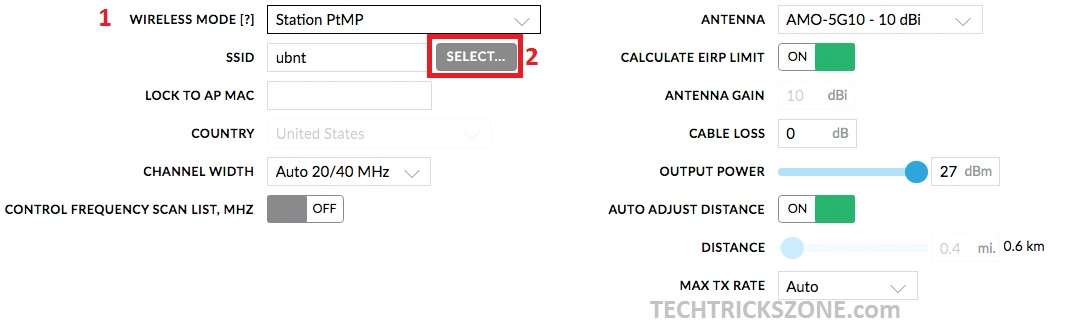
Go to the Wireless tab
1: Wireless Mode- Select Station PtMP
2: Click the SELECT button to scan the AP device.
Lock the Access Point device from the Scan list
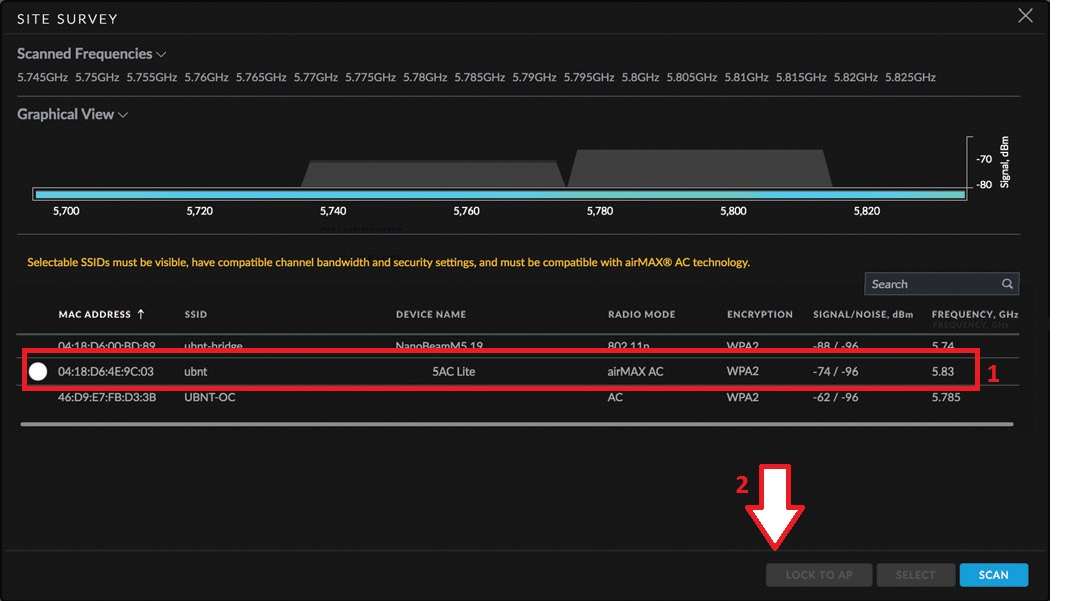
Provide a Wireless Security key as configured in the Access Point WDS device.
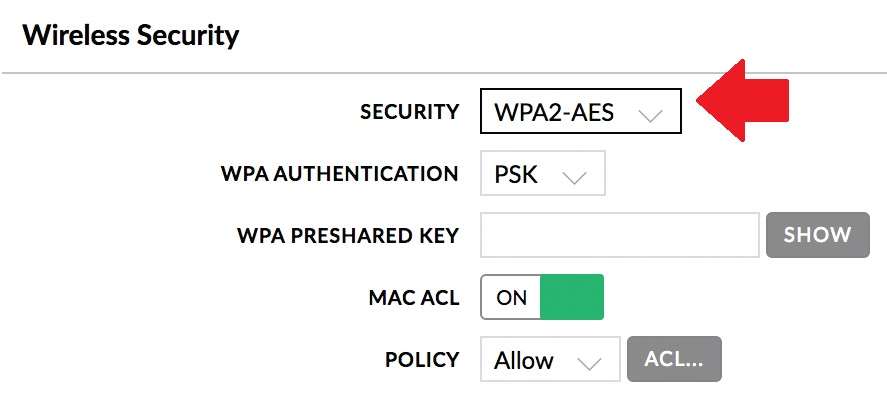
Security: Choose WPA2-AES (select same security type configured in AP Device)
After all settings press the Apply Setting button to reboot the device.
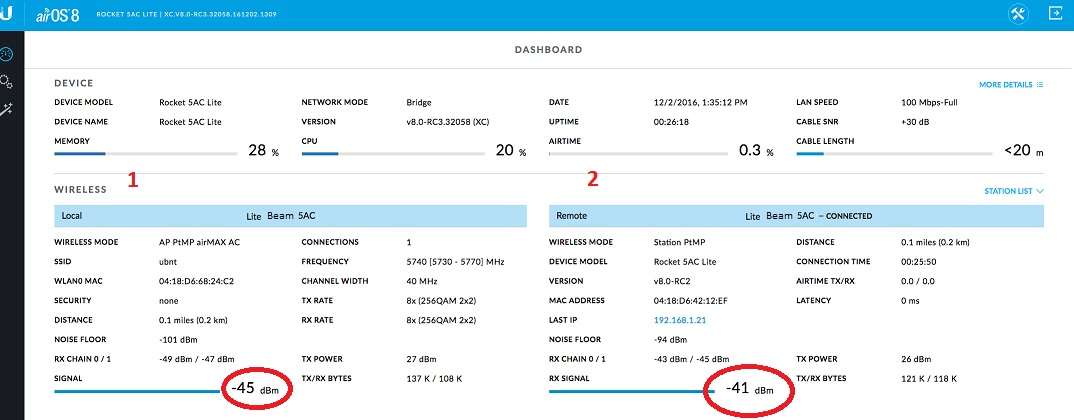
UBNT Wireless Point to Point Connection Status
To check the connection status you can check in the Dashboard.
The dashboard will show local and remote device signal status with Mac details and connection speed.
1: Wireless- Local Side Device Status
2: Remote Side CPE Device signal status with IP Address and CCQ details.
Final Word
The final word about lite beam is the best low-cost CPE device for the operator to provide internet over Wireless. As the device is loaded with airOS 8 so can be used for Point to Multipoint for connecting more than one site. If you are already using Ubiquity Networks wireless product then you know the performance and quality of lite beam and other UBNT products.
Related Post
- UBNT Power Beam 5AC Factory Reset [3Way]
- 5 Best Long Range Wireless Point to Point Device for Internet and CCTV
- How to connect two WiFi routers Without Cable wirelessly
- What is the use of Different Wireless Mode in WiFi Router?
